
, Part III")
Well, I spent another few hours in the shop yesterday on the smoother and got a lot done. I am very happy with how it is coming.I started by fitting the blade. I wanted a good fit between the blade and sidewalls – not so tight that I’d have to strike the blade to get it in place, but not so loose that there would be any significant lateral play. Using the float, I slowly shaved away material from the sides, test fitting often to check my progress.
I was patient and was rewarded with a great fit. This was a great practice for the more critical fitting of the mouth.
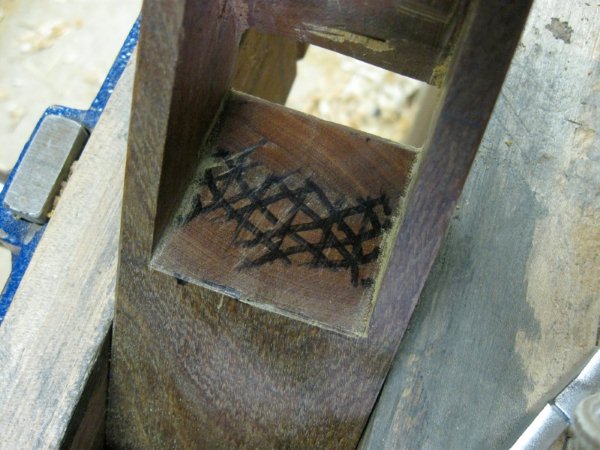
Next, I turned my attention to flattening the bed of the plane. From my rapid stock removal to form the bed, I’d inadvertently made a slightly convex bed, which is unacceptable. To get a truly flat bed, I used the float to hollow out the bed in a similar manner to creating a sprung glue joint. Then I coloured the bed with marker and began flattening the bed with a single-cut file with safe-cut (non-cutting) edges to prevent marring the side walls.

Because I had hollowed out the bed, the file registered off of the two high points at either end. Gradually those two points became wider and wider.
Once the marker was completely removed, I was done the bed.
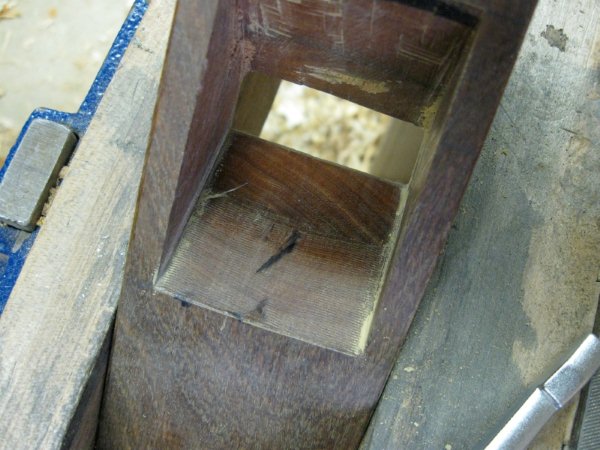
I checked that I hadn’t rounded over the bed side to side with a straight edge.
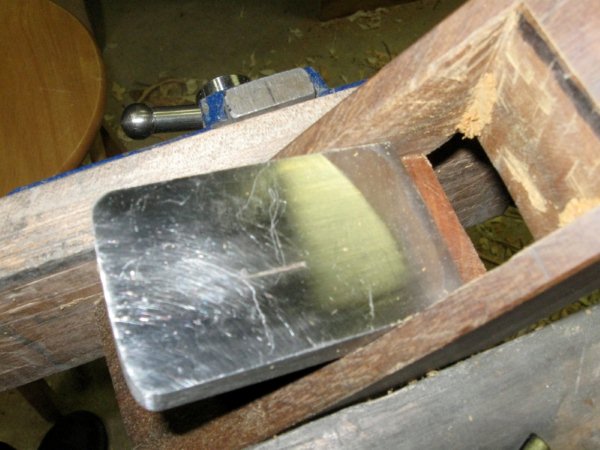
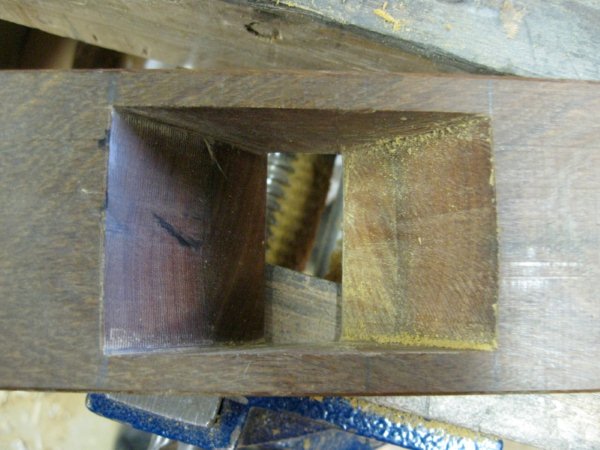
Now comes the exciting (and most critical part). I slid the blade into the plane and saw that the blade would not make it through the mouth.
This is exactly what I wanted because now I have the opportunity to fine-tune the mouth for the perfect fit. If the blade made it through, there is a good chance that it was because the mouth was too wide. I set the plane vertically in my vise with the toe down and carefully filed the mouth a little wider, then test fitted, then filed some more, then test fitted again. This is not the time to get impatient and make big adjustments. Here’s my end result – ain’t it pretty?

At this point, the only thing left to do to make the plane work is to make a wedge and install a pin for the wedge to wedge against (wonder how many times I can use “wedge” in a sentence?). Everything else is aesthetics. For example, I could use the file to further refine the escapement ramp (which was shaped with the float) to the same level as the bed.
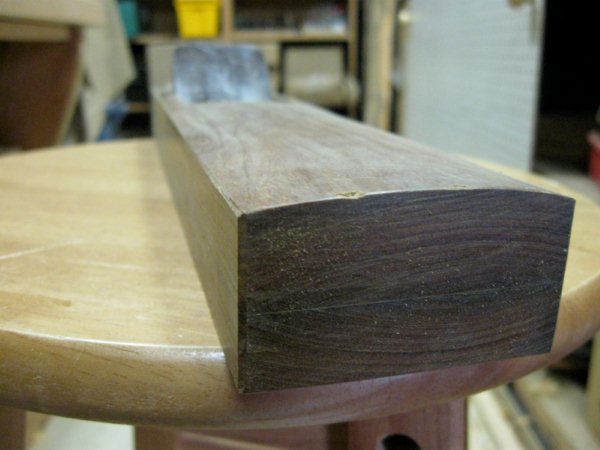
I do not like the feel of a block of wood with square edges, so I decided to round the top.
I found the quickest way to shape the body was to use a 1″ chisel, bevel up, held at approximately a 25 degree angle.
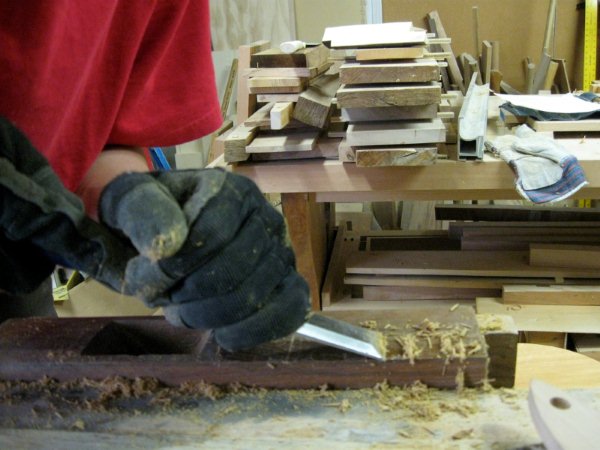
In most woods, if you tried this, the chisel would dive right into the wood, but not with lignum vitae. I refined the surface with a card scraper.
Discover more from Products From The Mind of Chris Wong
Subscribe to get the latest posts sent to your email.
