

Dave Kilpatrick is the kind of guy who hates to see wood go to waste. So when he heard that six solid-walnut chairs were being tossed out, he offered to take them. His wife must have been thrilled when he brought them home. Anyhow, they ended up in my garage where I let them sit while I figured out what I could do with them. The style was horribly dated, and I decided that they had no future as chairs so I asked my brother to knock them apart. This is what I ended up with: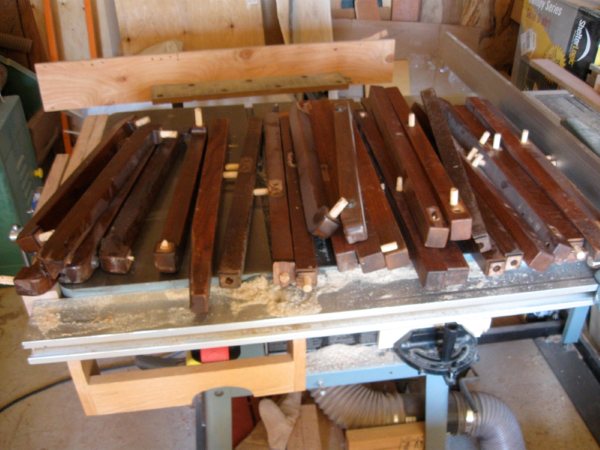
So, I thought, what could I do with a bunch of nice walnut sticks? I figured that I had enough to make a table top, so I started there. I dressed the sticks using my bandsaw, tablesaw, and thickness planer and carefully laid them out so that no seams lined up and so that the grain ran in all the same direction for ease of later surfacing. I went and had dinner, then came back to do the glue-up.
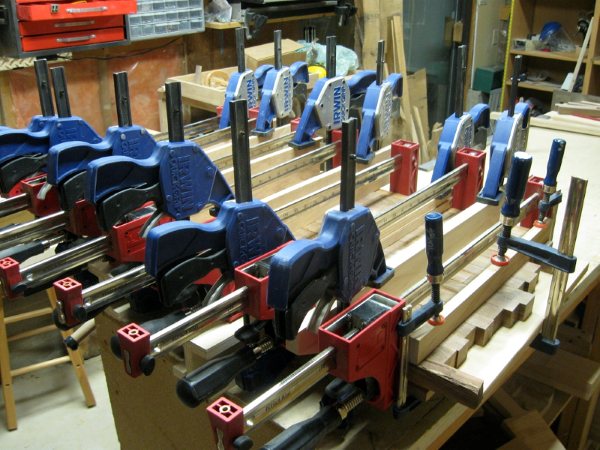
I started by covering a sheet of flat 3/4″ plywood with kraft paper to protect my nice plywood from glue. The stiff plywood served as a surface to do the glue-up on, and one which the glued top could be clamped to to ensure it stays relatively flat. I got out my bottle of liquid hide glue and for curiousity’s sake, started the timer I keep in my shop. I applied worked quickly and calmly, applying glue to every mating surface then rubbing the mating surfaces together until the glue grabbed. It was a long glue-up, with 61 pieces. 90 minutes later, I put the last clamp on before washing my hands and cleaning up the shop.
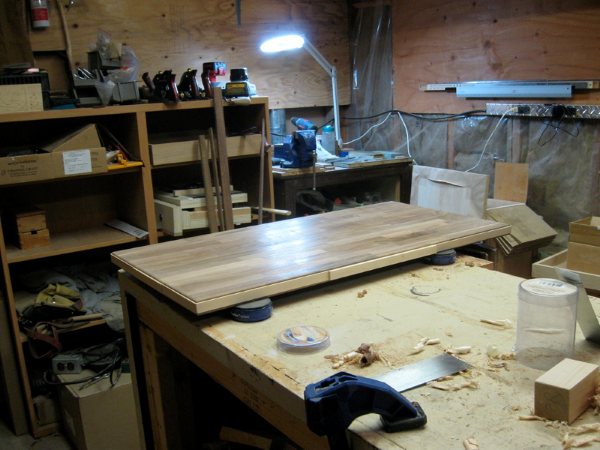
I let the assembly dry for 24 hours before removing the clamps. I used handplanes to flatten and smooth the top starting with a scrub plane before progressing to a jack plane and smooth plane. I flattened the bottom with the scrub and finished the less-critical surface with the jack plane.
The top looked stellar, but I had one minor problem: The chairs had been joined with dowels. I had been careful to make sure none of these dowels showed on the top surface, but it couldn’t be avoided around the edges. And the bottom was riddled with holes, but thankfully not enough to be a structural issue.
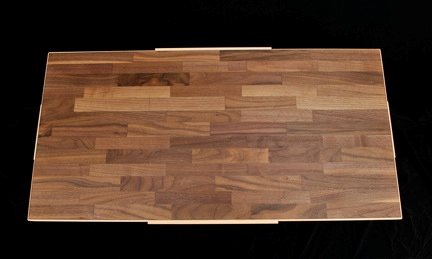
I had considered running banding around the outside of the table, but ruled that out as it would make the table look like it was veneered. I decided to rout a groove along the four edges of the top and insert a strip of maple to cover the holes. It worked like a charm. After milling the groove, I planed the maple for a friciton fit in the groove.
To simplify the corner joinery, I used three pieces of maple along each edge – one at either corner and one in the center. 45-degree miters went on the end towards the corner and a 5-degree miter went on the opposite end. I cut the miters in the corners first and installed the eight pieces. I then measured the length of the four center pieces directly off of the table, then cut them a little long at 5 degrees. This little detail ensured that no gaps would show. I realized afterwards that by cutting them a little long, I had inadvertently created an interesting design feature, a sort of keystone, if you will. Though I had initially planned on planing them flush, I decided to leave them proud.
With the desk’s top almost done, I used a card scraper on the top surface to give it the final smoothing. Here’s what the scraped surface looked like. Note that this is a bare scraped surface with absolutely nothing on it – no finish or anything. This is why I love my planes and scrapers.
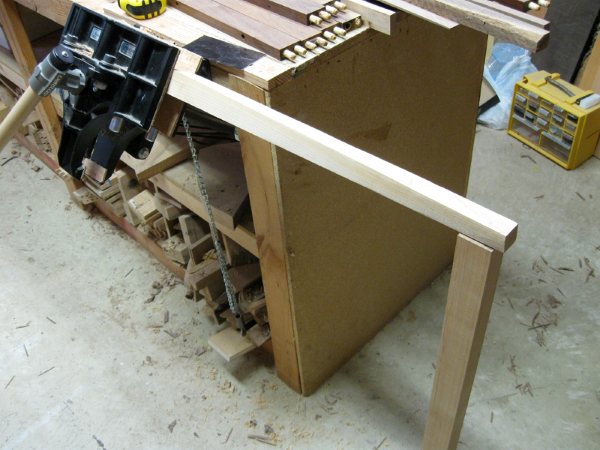
No matter how nice the top looks, a table is not a table without a base. A few years ago, I had started building a desk but abandoned the project for some reason. I had rough-shaped the legs with an eighth-twist in them using a drawknife, then stopped. I liked the look of them – simple, tapered legs with a bit of a twist (pun intended). I dusted them off and finished making them using a spokeshave followed by a card scraper. It’s so nice having a patternmaker’s vise. I use the tilt and rotation features daily. I get a fair bit of use of the skew-able front jaw too. And of course, the quick-release foot-pedal on this vise gets a workout every day. To shape the legs, I tilted the vise up a bit so that I was working on a level surface and supported the far end with a cut-to-length bench slave.
Using some of the wider walnut pieces, I made the aprons for the table. They were long enough to make the side aprons from one piece, but the front and back apron needed to be made from three pieces. I glued them up and added a glue block along the length on the inside to reinforce the long aprons. I cut a concave curve along the bottom edge of the front apron and added maple trim to the bottom edge of each apron to cover the screw holes and visually tie the aprons to the top. I assembled the base, then finished the top and base separately with an oil/varnish blend. Once the finish dried, I attached the top to the base.

Discover more from Products From The Mind of Chris Wong
Subscribe to get the latest posts sent to your email.

One thought on “From Chair to Table, Literally”