

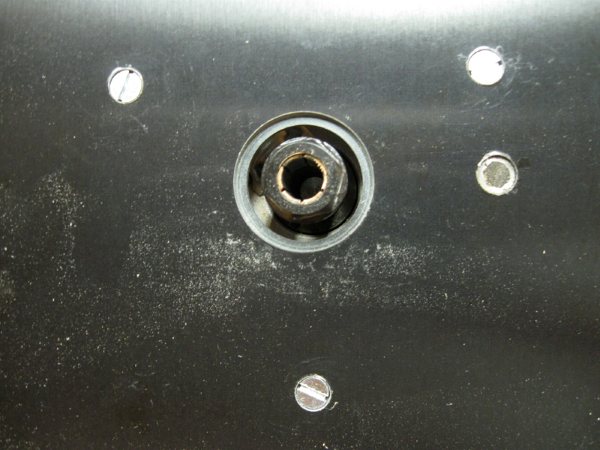
The first thing I did was remove the three machine screws holding the router’s baseplate to the router and use double-stick tape to secure the baseplate to the phenolic router table. I drilled clearance holes for the three machine screws and countersunk them because the supplied screws were flat-headed. Some models of routers use pan-head screws and in that case, I would have counterbored the holes with a forstner bit. I drilled a fourth hole in case I wanted to use the above-the-table-adjustment feature that this router offers. Then I removed the baseplate from the phenolic and bolted the router to the underside of the phenolic.
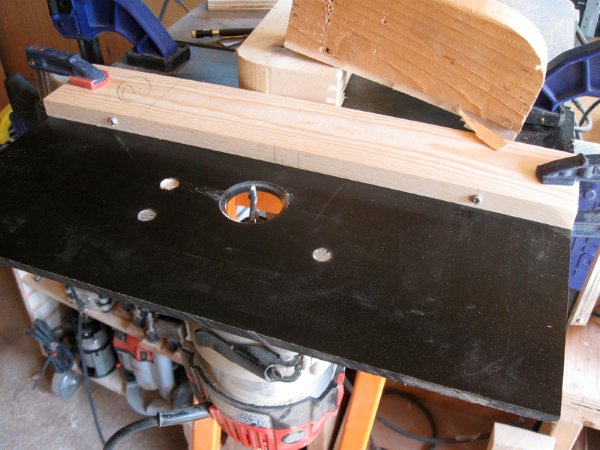
I’ve found that the bandsaw table is a good working height for smaller routing tasks, so I simply clamped the router table to the edge of the bandsaw’s table with a pair of QuickGrip clamps.
To mill the slots, I needed a fence to guide my stock in a straight line. I grabbed a scrap of pine and checked that the edge was straight and cut it to the approximate length of the table. I clamped it to the table at the correct distance from the bit which I had already installed. Because I was milling stopped slots, I needed to set stops. To position the stops, I first used a square piece of stock registered against the fence and bit to mark where the bit is located directly on the fence. I wanted the slots to stop 1/2″ from each end, so I made a mark 1/2″ to either side of the bit’s location on the fence.
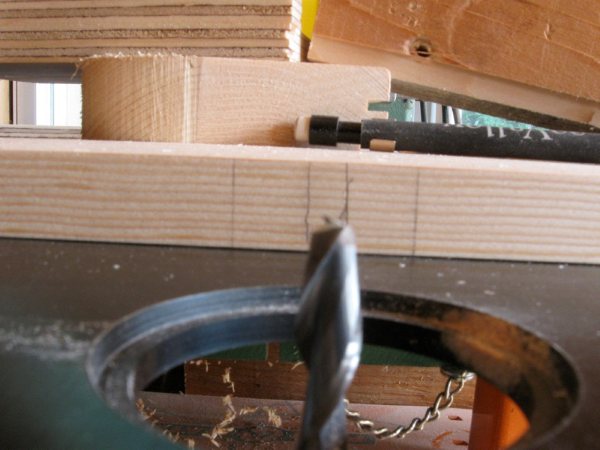
Then, using the stock I would be milling, I marked where I wanted to start and stop the cuts. To keep things simple, I used a short screw for each of my stops. I am now ready to mill.
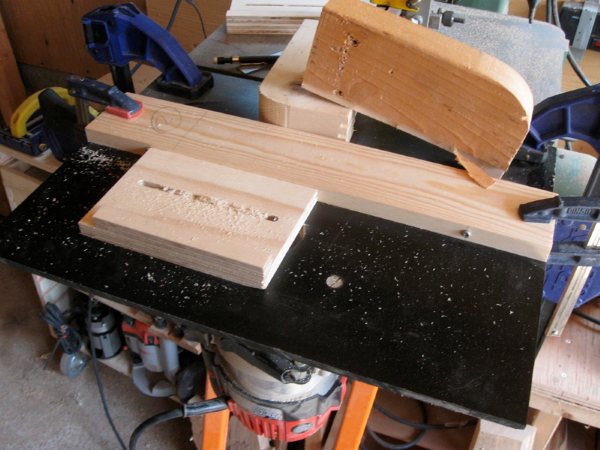
Here is the completed cut. I used a 1/4″ spiral bit to mill the slot through 1/2″ plywood in a single, steady pass.
To reuse the fence, I just need to take one pass over the edge with a handplane to remove the layout marks.
Discover more from Products From The Mind of Chris Wong
Subscribe to get the latest posts sent to your email.
