

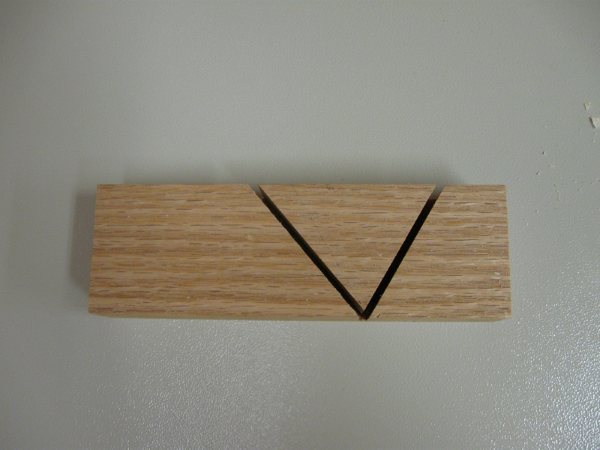
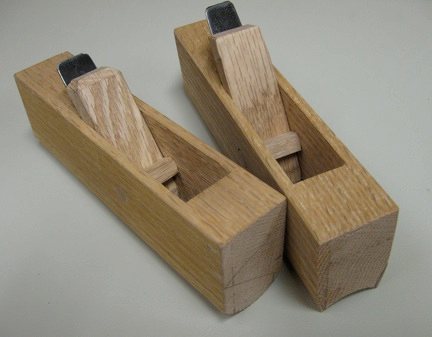
A while ago, I came up with a more efficient way to make a wooden molding plane. There are some compromises, but the tool is very practical, does a good job and quick and easy to make. For this pair of planes with 1″ wide blades, I started with material 1-3/8″ thick. I used my table saw with a full-kerf blade to resaw off a 1/4″ slice which would become one cheek. I then made two 1″ deep cuts for the bed and ramp, at 50- and 60-degrees respectively. The saw leaves clean surfaces which require no further cleanup.
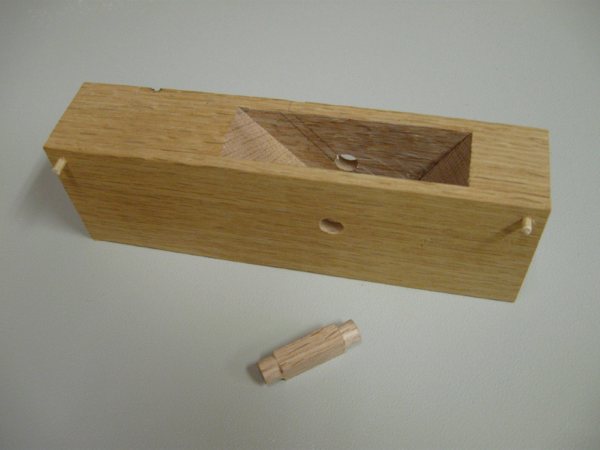
The next step is to remove the triangular piece of waste between the two cuts. I start with a narrower 1/2″ chisel to remove the bulk, then switch to a wider 3/4″ or 1″ chisel and a pair of skews to finish the work. The refinement of this surface is not critical – it’s more for aesthetics.

Now I put the cheek that I sawed off earlier back in place. I drill a pair of 1/8″ holes in the upper corners to use 1/8″ dowels to positively locate the two pieces. I cut a length of 3/8″ square stock a little wider than the plane (1-1/4″) and round over about 5/16″ on both ends. I use a carving knife and a drill gauge to make the ends round and check their dimension, ensuring both are uniform. Next, I locate the position of the pin at the midpoint and about 1/2″ above the ramp. I install the drill bit matching the diameter of the ends of the pin in my drill press and bore through both cheeks.
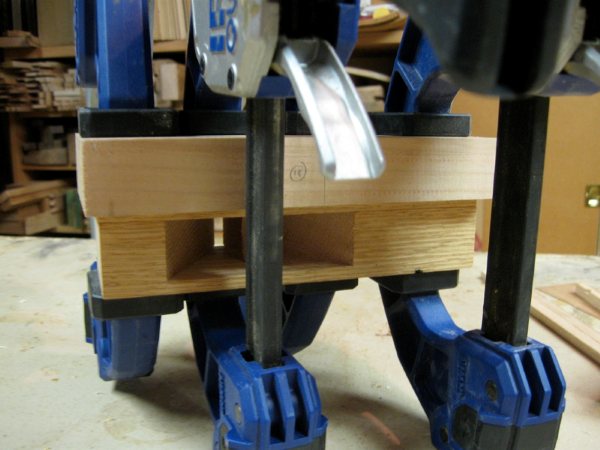
Next, I remove the cheek and check that the pin fits properly. If all is well, it’s time for glue-up. I use one caul larger than the plane itself and a handful of clamps. The pin goes in first and does not get glued.
While the glue is drying, it’s a good time to flatten the back of the blades. If your blades are blank, now would also be a good time to approximately grind the profiles. Once the glue is dried, it’s time to make and fit the wedge. I’ve been informed that an angle of around 1:4 works well. I checked the wedges that I’ve made in the past and they are pretty close to that angle. When making the wedge, I like to use an over-long piece of stock for ease of handling.
Cut the wedge, plane it smooth, and test-fit it in place with the blade installed. Wiggle the iron and see if it seems to rotate at one point which indicates a high spot. Rework the wedge and try again until it registers fully across the blade and pin.
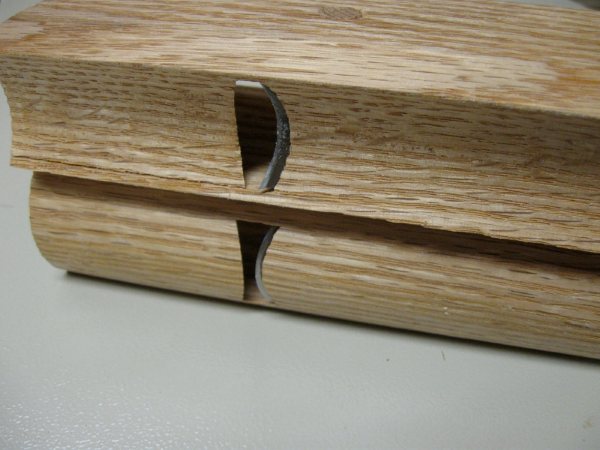
All that’s left is to shape the planes. The trick is to shape the round (convex) plane first. Make the arc of the blade and sole match. Then use the round plane to shape the sole of the hollow (concave) plane. Finally, shape the concave blade to the sole. I like to stamp my initials on the back of the planes as well.
Last weekend, I gave a workshop on making this pair of planes for some members of the Pacific Woodworkers Guild. Everyone had a good time and gained both knowledge and experience.
Discover more from Products From The Mind of Chris Wong
Subscribe to get the latest posts sent to your email.

Chris, where do you get your blades? Are they already tempered, or are you doing that, too? You make this look very easy!!
Hi Vic,
I ordered replacement blades for commercially available molding planes.
Very nice planes! I’m gonna take this idea and run with it. -Matt