

On the morning of Sunday, April 15th, Morton and I exchanged ideas about trestle tables, spurred on by a recent sketch of a table on which he was working. That got me yearning to build a trestle table.
I documented my progress live on Twitter which was useful because each update had a time stamp so followers could see the rate at which I progressed. Here is a list of the previous Sessions:
Session 1 – Flat Boards are Boring;
Session 2 – Playing with Slabs;
Session 3 – From Two Slabs to One Table Top;
Session 4 – Clamping Odd Shapes and Sketching on Wood;
Session 5 – Routing Pockets for Battens;
Session 6 – Making Battens and Installing Countertop Connectors;
Session 7 – Installing Battens and Flattening the Underside;
Session 8 – Make Your Tools Work for You and Flattening the Top;
Session 9 – Mortises the Slow Way (or Why I’m Buying a Domino XL);
Session 10 – Curvy Legs are Always Good;
Session 11 – Straight Lines on Wonky Surfaces;
Session 12 – Fitting the Mother of all Mortise & Tenon Joints;
Session 13 – Making Things Better, Worse, then Better;
Session 14 – Battens and Complicated Tenons, Again;
Session 15 – The Trestle Comes Together Session;
Session 16 – Angled Mortises and Tenons;
Session 17 – Two Feet for Two Legs;
Session 18 – Attachment Strips and Power Carving;
Session 19 – Refining the Sculpted Base; and
Session 20 – A Little Sanding, then Lots More Sanding.
(If you are not familiar with the format used on Twitter, every update, or “tweet” below starts with a username, being the author of that tweet. Sometimes, you see two or more usernames in a tweet. The second (and third, etc) usernames are preceded by a @ symbol and are people to whom the author is talking. The other symbol you see is #, which serves as a category. I try to remember to categorize all my tweets pertaining to this project under #flairww.)

FlairWoodworks Welcome to Session 21! I’m… sanding the base. #flairww -12:44 PM May 21st, 2012
FlairWoodworks I lightly chamfered the bottoms of the feet pads with a block plane. One leg is done. #flairww -1:35 PM May 21st, 2012
FlairWoodworks Yesterday, I was battling pigtails (circular scratches) left by my random orbit sander. #flairww -1:58 PM May 21st, 2012
FlairWoodworks A comment by @Tumblewood reminded me that the pigtails may have been caused by operator error rather than the tool. #flairww -1:58 PM May 21st, 2012
FlairWoodworks When shaping, I keep the sander moving quickly to avoid creating dips. But when smoothing and polishing I need to move more slowly. #flairww -2:00 PM May 21st, 2012
FlairWoodworks The stretcher is now done as well. Just the other leg, then the base is complete! #flairww -2:23 PM May 21st, 2012
FlairWoodworks I’ve finished sanding the base! #flairww -3:23 PM May 21st, 2012
DyamiPlotke @FlairWoodworks woot! -3:26 PM May 21st, 2012
TheWoodBug @FlairWoodworks WOOOOOOOOOOOOOOt :) -3:27 PM May 21st, 2012
FlairWoodworks @DyamiPlotke @TheWoodBug I feel kinda lost, like I’m not sure what to do next. I guess 12 hours straight of sanding does that. #flairww-3:27 PM May 21st, 2012
FlairWoodworks As much as I’d like to put base on the ground and the top on it, I don’t want to move the top around more than necessary. #flairww -3:29 PM May 21st, 2012
TheWoodBug @FlairWoodworks @DyamiPlotke Exactly why i never do one build at a time,always something different to do that way, and more productive – -3:30 PM May 21st, 2012
FlairWoodworks I think my next step will be to finish joining the table top. I’ll take it apart and glue in the floating tenons. #flairww -3:33 PM May 21st, 2012
FlairWoodworks @TheWoodBug I don’t have room to build two big tables in my shop like you do! @DyamiPlotke #flairww -3:34 PM May 21st, 2012
FlairWoodworks I’ll work on the top after lunch. #flairww -3:36 PM May 21st, 2012
DyamiPlotke @FlairWoodworks why use tenons, counter attacher things & batons to hold the top together? -3:50 PM May 21st, 2012
FlairWoodworks @DyamiPlotke Each has its own strength. Tenons provide alignment over the length of the joint, battens provide “snap resistance”… #flairww -3:55 PM May 21st, 2012
FlairWoodworks @DyamiPlotke … and the countertop connectors hold the two slabs together mechanically. #flairww -3:55 PM May 21st, 2012
DyamiPlotke @FlairWoodworks I know, but wouldn’t any one of the three plus a basic glue joint have been plenty strong? -4:08 PM May 21st, 2012
FlairWoodworks @DyamiPlotke I’m not sure because the joint is long-grain to mitred end grain. #flairww -4:12 PM May 21st, 2012
DyamiPlotke @FlairWoodworks ah. Could be a weak glue joint. Makes sense to reinforce. -4:31 PM May 21st, 2012
sleepydogwood @FlairWoodworks sounds exciting -4:47 PM May 21st, 2012
sleepydogwood @FlairWoodworks you building as for a customer or a spec piece ? -4:49 PM May 21st, 2012
FlairWoodworks It’s speculative. Know anyone interested? #flairww RT @sleepydogwood: @FlairWoodworks you building as for a customer or a spec piece ? -4:51 PM May 21st, 2012
FlairWoodworks Have you seen the slideshow depicting the progress of the Maple Trestle Table? #flairww -4:25 PM May 21st, 2012
FlairWoodworks So I walked back into the shop and tripped over the table base. Thankfully, it’s okay. (I am too.) #flairww -4:37 PM May 21st, 2012
FlairWoodworks Before I take the two halves apart I want to work out a clamping strategy. #flairww -4:47 PM May 21st, 2012
FlairWoodworks I just did what I think is the smartest thing I’ve done all day – I moved the base out of the workshop where it won’t get damaged. #flairww -4:53 PM May 21st, 2012
FlairWoodworks I’m going to make a caul to provide a square clamping surface. I’ll need one for the other end too. #flairww -4:56 PM May 21st, 2012
FlairWoodworks I forgot how heavy this table top is. #flairww -5:01 PM May 21st, 2012
BCcraftmaster @FlairWoodworks it would only be stupid if it was raining out! -5:01 PM May 21st, 2012
FlairWoodworks @BCcraftmaster It is raining outside, but wisely, I didn’t move the table base outside! #flairww -5:04 PM May 21st, 2012
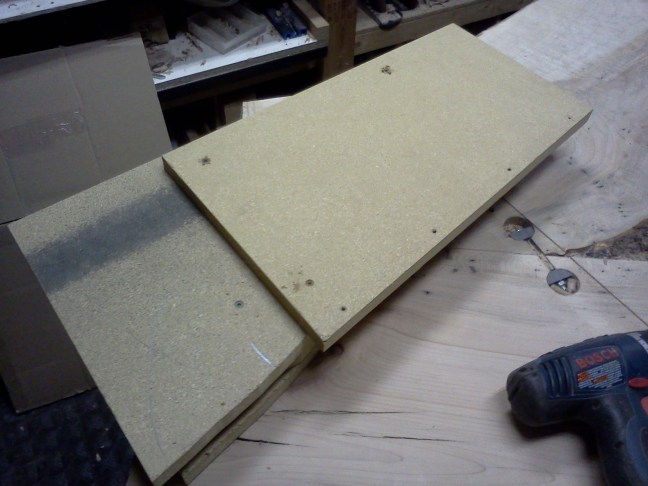
FlairWoodworks I traced the table edge’s profile onto a piece of 3/4″ particle board. #flairww -5:07 PM May 21st, 2012

FlairWoodworks I’m going to use three layers of 3/4″ particle board for the cauls so they are 2-1/4″ thick. The table top is 2-1/8″ thick. #flairww -5:14 PM May 21st, 2012
FlairWoodworks I screwed the three layers of particle board together and cut the curve with my jigsaw. #flairww -5:50 PM May 21st, 2012
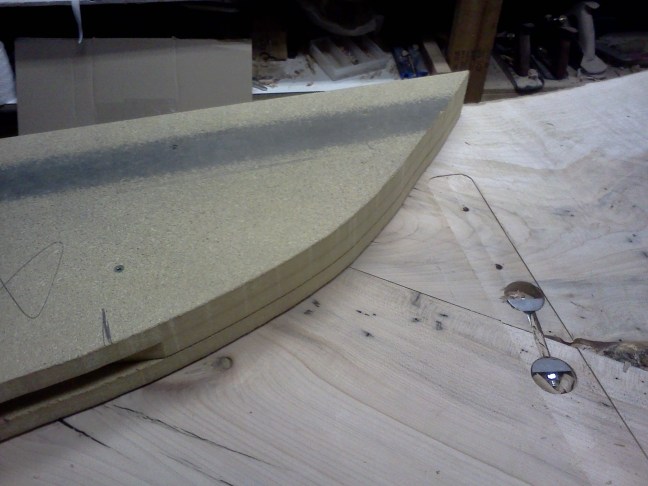
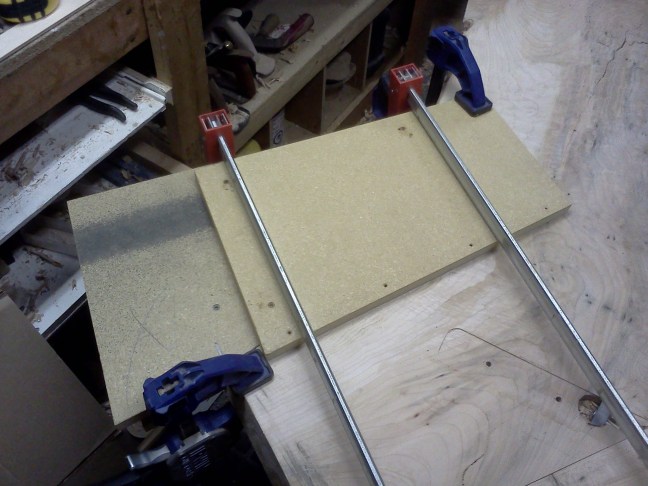
FlairWoodworks To keep the caul from slipping on the curve, I screwed a scrap to the caul’s face. #flairww -5:53 PM May 21st, 2012
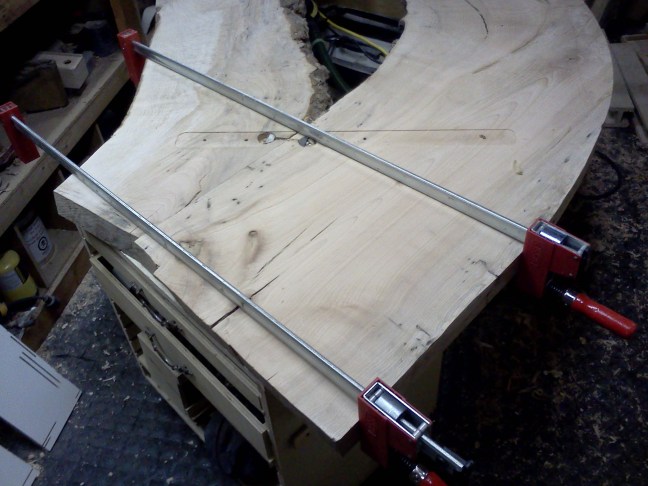
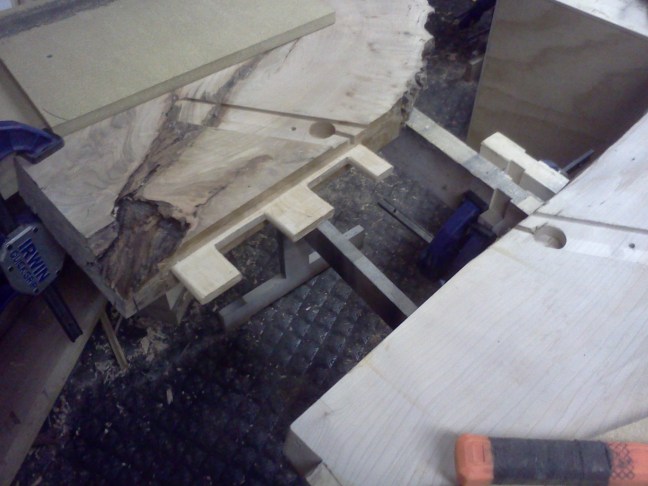
FlairWoodworks The two blue clamps keep the caul from sliding as the red clamps apply pressure to the joint. #flairww -5:56 PM May 21st, 2012
FlairWoodworks Now I’ll take apart the two halves of the top! #flairww -5:58 PM May 21st, 2012
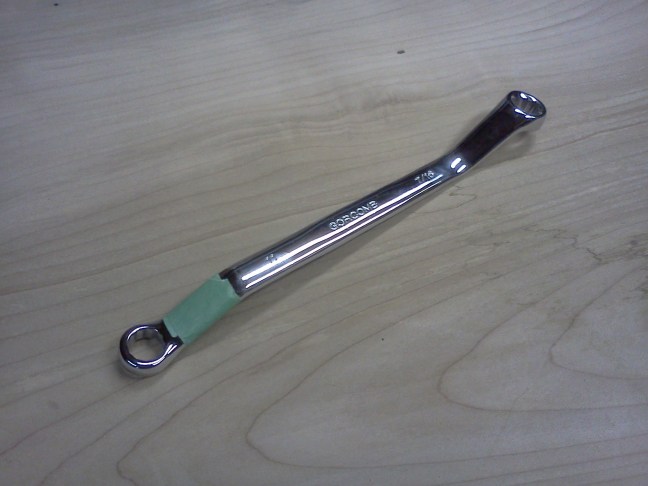
FlairWoodworks I put a piece of tape on the end of my wrench used to tighten the countertop connectors. #flairww -6:02 PM May 21st, 2012
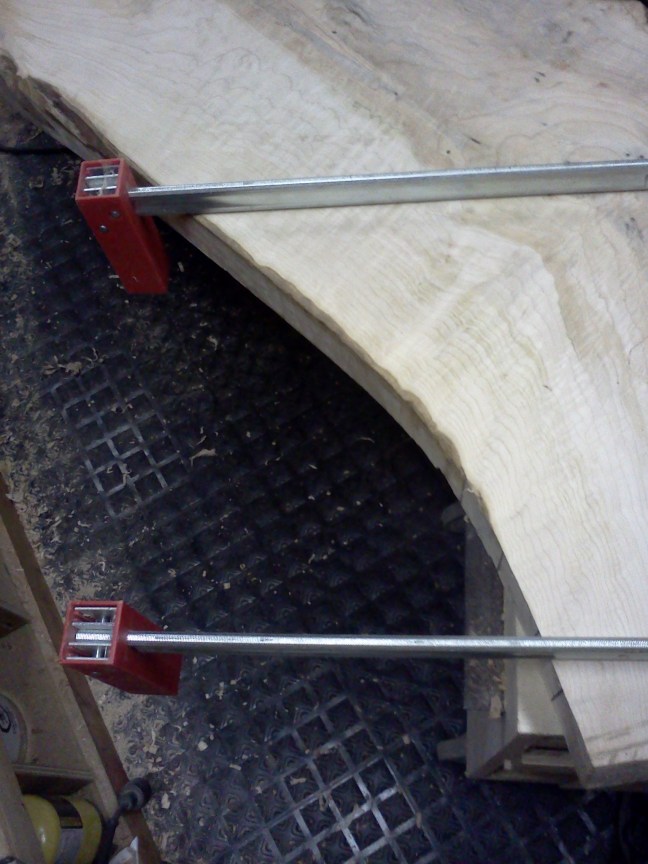
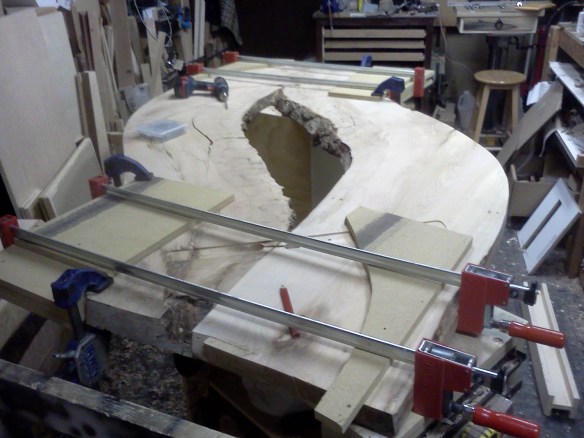
FlairWoodworks The clamps pull the joint tight. But the pressure is uneven and I can’t see the other side. #flairww -6:11 PM May 21st, 2012
FlairWoodworks I’m contemplating how to do this glue-up. I need to be able to put clamps on both sides and need to be able to see both sides. #flairww -6:12 PM May 21st, 2012
FlairWoodworks I need to use clamps at least 50″ long. I have Bessey K-Body clamps – (4) 50″, (2) 82″ as well as (4) 72″ aluminum bar clamps. #flairww -6:15 PM May 21st, 2012
FlairWoodworks I am considering doing this glue-up vertically with the table on edge. #flairww -6:15 PM May 21st, 2012
FlairWoodworks Sawhorses would also work. #flairww -6:19 PM May 21st, 2012
FlairWoodworks I still have to figure out how to get the slabs apart too. Those monster tenons were friction fit! #flairww -6:20 PM May 21st, 2012
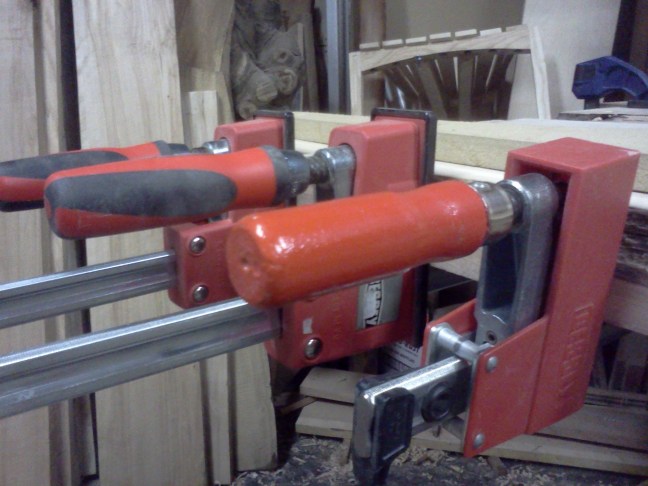
FlairWoodworks This is the clamping arrangement I’ll use. The top side is flat and the joint is tight. #flairww -6:43 PM May 21st, 2012

BCcraftmaster @FlairWoodworks that should do the trick. -6:46 PM May 21st, 2012
FlairWoodworks One of these might be handy. #flairww-6:48 PM May 21st, 2012

FlairWoodworks I much prefer the handles on the new K-Body clamps. They’re bigger and allow a better grip. #flairww -6:55 PM May 21st, 2012
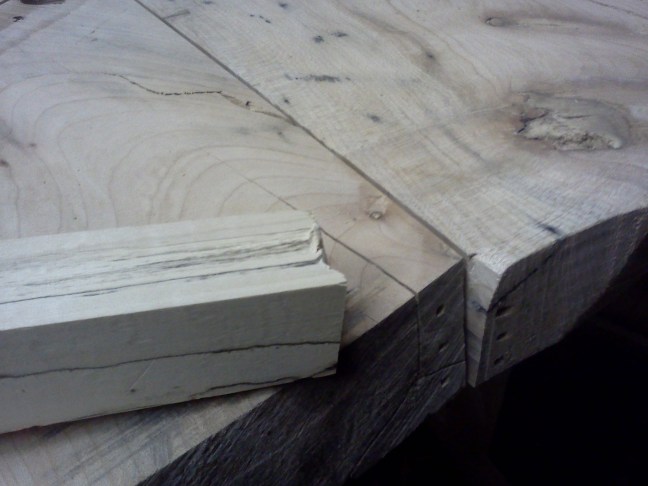
FlairWoodworks Clamps are off… now how do I get the two slabs apart? #flairww -6:58 PM May 21st, 2012
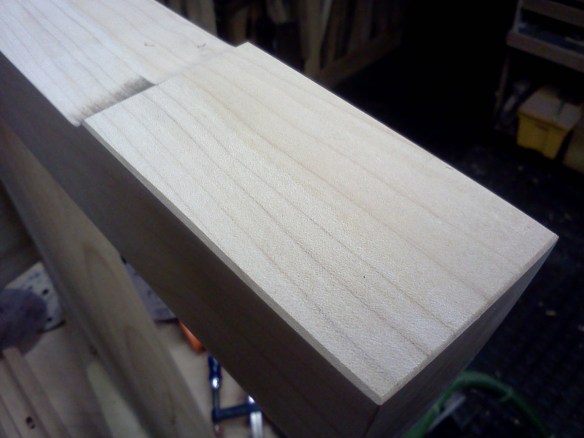
FlairWoodworks I was smart enough to not cut the ends flush so I have a place to start driving apart the joint. #flairww -7:02 PM May 21st, 2012
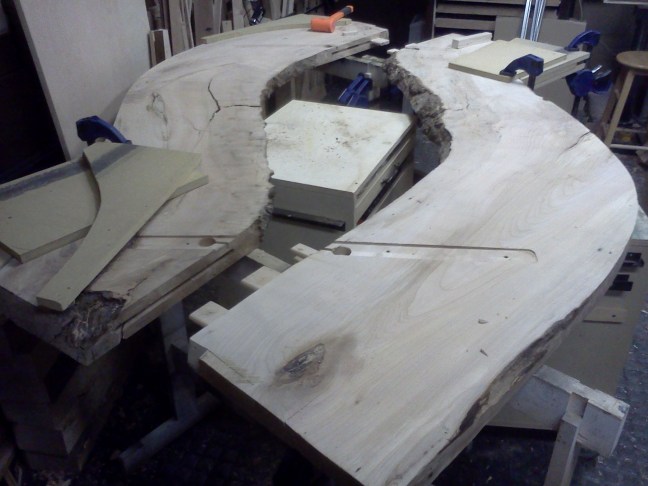
FlairWoodworks I got the joint apart. Now I need to remove the floating tenons! #flairww -7:08 PM May 21st, 2012
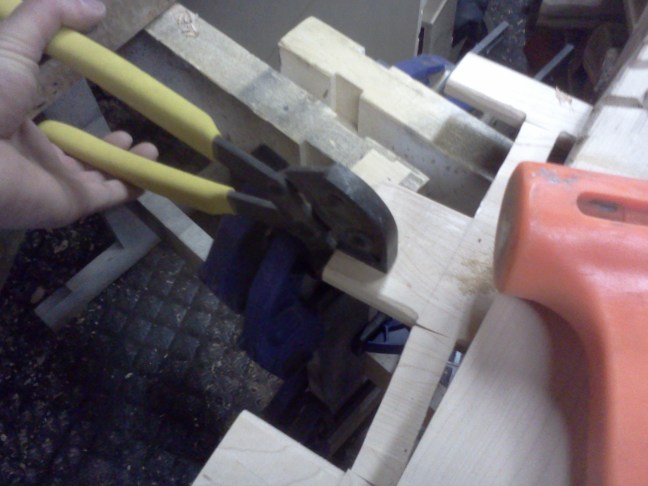
FlairWoodworks Have I mentioned that I love these Extractor pliers for pulling tenons? #flairww -7:12 PM May 21st, 2012
FlairWoodworks Who wants to see THIS glue-up? #flairww -7:18 PM May 21st, 2012
FlairWoodworks I plan to glue the floating tenons in the shaded areas. #flairww -7:27 PM May 21st, 2012

FlairWoodworks Well that was fun. #flairww -8:31 PM May 21st, 2012
FlairWoodworks In the first stage of the glue-up, I glued the tenons into one of the slabs. #flairww -9:00 PM May 21st, 2012
FlairWoodworks I am tired. I’m done in the shop for the day. #flairww -9:00 PM May 21st, 2012
Next comes the big glue-up. You don’t want to miss it! You can leave a comment here.
Discover more from Products From The Mind of Chris Wong
Subscribe to get the latest posts sent to your email.

No wonder you eat like a horse throwin’ those slabs around all day. I don’t think that car would help you at all, but you might consider the jack it’s on.