

On the morning of Sunday, April 15th, Morton and I exchanged ideas about trestle tables, spurred on by a recent sketch of a table on which he was working. That got me yearning to build a trestle table.
I documented my progress live on Twitter which was useful because each update had a time stamp so followers could see the rate at which I progressed. Here is a list of the previous Sessions:
Session 1 – Flat Boards are Boring;
Session 2 – Playing with Slabs;
Session 3 – From Two Slabs to One Table Top;
Session 4 – Clamping Odd Shapes and Sketching on Wood;
Session 5 – Routing Pockets for Battens;
Session 6 – Making Battens and Installing Countertop Connectors;
Session 7 – Installing Battens and Flattening the Underside;
Session 8 – Make Your Tools Work for You and Flattening the Top;
Session 9 – Mortises the Slow Way (or Why I’m Buying a Domino XL);
Session 10 – Curvy Legs are Always Good;
Session 11 – Straight Lines on Wonky Surfaces;
Session 12 – Fitting the Mother of all Mortise & Tenon Joints;
Session 13 – Making Things Better, Worse, then Better;
Session 14 – Battens and Complicated Tenons, Again;
Session 15 – The Trestle Comes Together Session;
Session 16 – Angled Mortises and Tenons;
Session 17 – Two Feet for Two Legs;
Session 18 – Attachment Strips and Power Carving;
Session 19 – Refining the Sculpted Base;
Session 20 – A Little Sanding, then Lots More Sanding; and
Session 21 – Preparing for a Big Glue-Up.
(If you are not familiar with the format used on Twitter, every update, or “tweet” below starts with a username, being the author of that tweet. Sometimes, you see two or more usernames in a tweet. The second (and third, etc) usernames are preceded by a @ symbol and are people to whom the author is talking. The other symbol you see is #, which serves as a category. I try to remember to categorize all my tweets pertaining to this project under #flairww.)

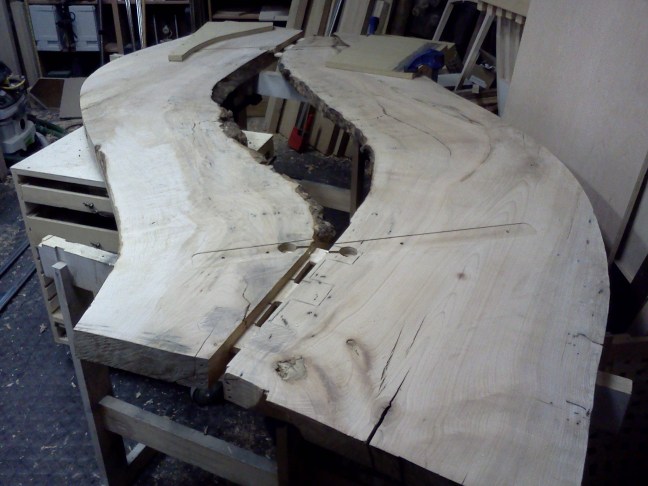
FlairWoodworks I’m back at work on the table top. The tenons are glued into one side. #flairww -12:34 PM May 22nd, 2012
FlairWoodworks The fit of the tenons into the mortises is too tight to allow easy assembly so I’m going to work on that. #flairww -12:35 PM May 22nd, 2012
Tumblewood Have you thought about only gluing the middle tenon on each? RT @FlairWoodworks: The fit of the tenons into the mortises is too tight to allow an easy assembly so I’m going to work on that. #flairww -12:38 PM May 22, 2012
FlairWoodworks @Tumblewood I’ll be gluing only the outermost tenon of each end. #flairww -12:38 PM May 22nd, 2012
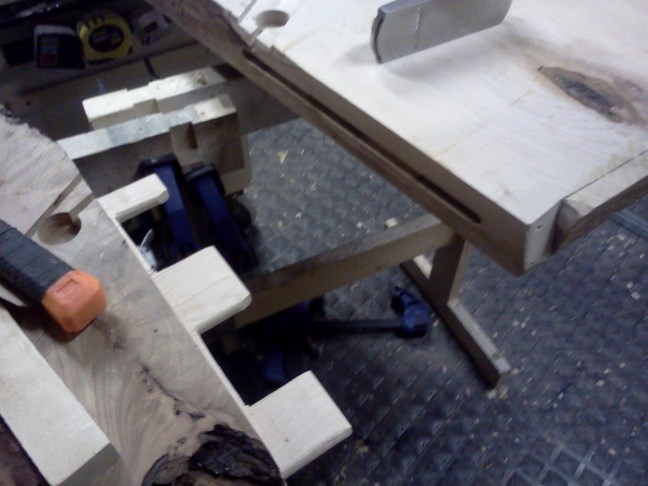
FlairWoodworks Softwood wedges are awesome. Here, I’m using them to drive apart the joint. #flairww -12:49 PM May 22nd, 2012

luggermatt @FlairWoodworks I use softwood wedges a lot. Saves so much struggling :-) -12:51 PM May 22, 2012
FlairWoodworks I hope it doesn’t take all day to tune these tenons, like it did to cut them. I’m starting to tire of wrestling with these slabs. #flairww -12:51 PM May 22nd, 2012
FlairWoodworks I just noticed that Sessions 19-22 have been on that day of the month! (Welcome to Session 22!) #flairww -12:53 PM May 22nd, 2012
FlairWoodworks Are there any clamps that have an endless thread? I dislike having to reset clamps to pull together big joints. #flairww -12:59 PM May 22nd, 2012
FlairWoodworks That’s one of the reasons I like QuickGrip clamps – they can clamp their entire capacity without being reset. #flairww -1:00 PM May 22nd, 2012
FlairWoodworks I’ve gotta say, it’s no fun test-fitting these monster joints. #flairww -1:22 PM May 22nd, 2012
FlairWoodworks The trouble with fitting these slabs is that because they are so heavy, I can’t feel where the joint is tight. There is no sensitivity. #flairww -1:29 PM May 22nd, 2012
FlairWoodworks Pound the joint part-way together until it gets stuck, drive it apart with wedges, trim the tenons a little, repeat. #flairww -1:33 PM May 22nd, 2012
FlairWoodworks This scale of work merits full baseball-type swings of the mallet. #flairww -1:37 PM May 22nd, 2012
Toolwriter @FlairWoodworks Bigger hammer….I like hammers… -1:45 PM May 22nd, 2012
FlairWoodworks One of those Commander mallets might fit the bill. #flairww RT @Toolwriter: @FlairWoodworks Bigger hammer….I like hammers… -1:46 PM May 22nd, 2012
Tumblewood @FlairWoodworks @Toolwriter @FlairWoodworks what is a Commander mallet? 2lbs sledge? -1:47 PM May 22nd, 2012
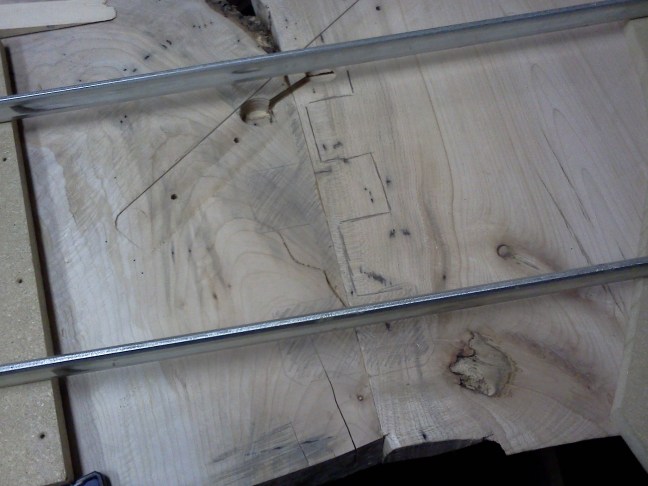
FlairWoodworks My longest clamp is just long enough to pull the two slabs into alignment. #flairww -1:48 PM May 22nd, 2012

FlairWoodworks @Tumblewood Try 8-1/2 pounds with a long handle. #flairww @Toolwriter -1:48 PM May 22nd, 2012

Tumblewood @FlairWoodworks @Toolwriter oh god!! Don’t break that puppy! -1:49 PM May 22nd, 2012
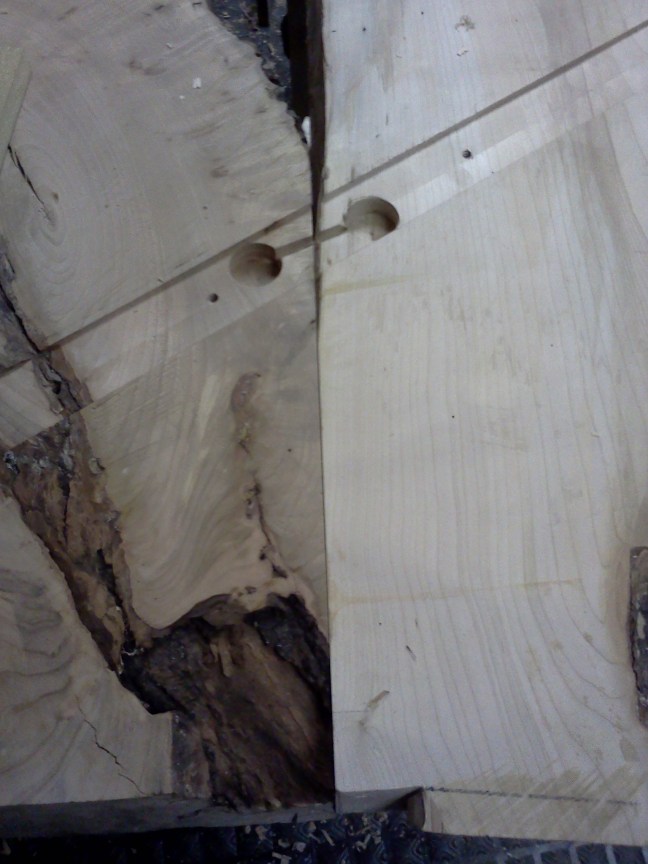
FlairWoodworks This seam is very tight. #flairww -1:57 PM May 22nd, 2012
FlairWoodworks However, the other seam is not tight. I’ll see if a couple more clamps can pull it together. #flairww -1:58 PM May 22nd, 2012
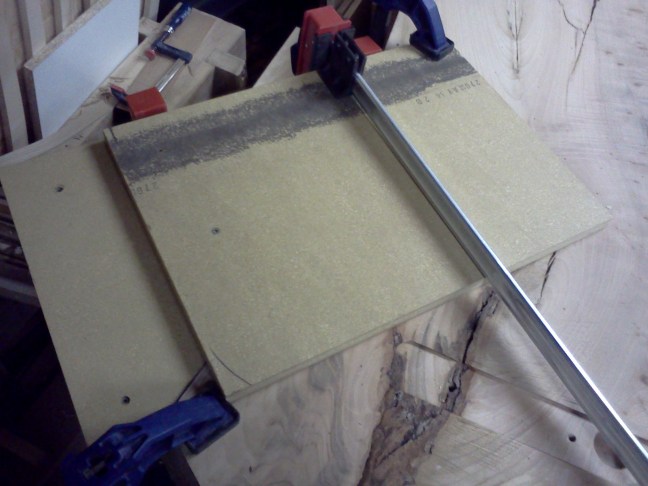
FlairWoodworks More clamping pressure is just causing the caul to slip. #flairww -2:02 PM May 22nd, 2012
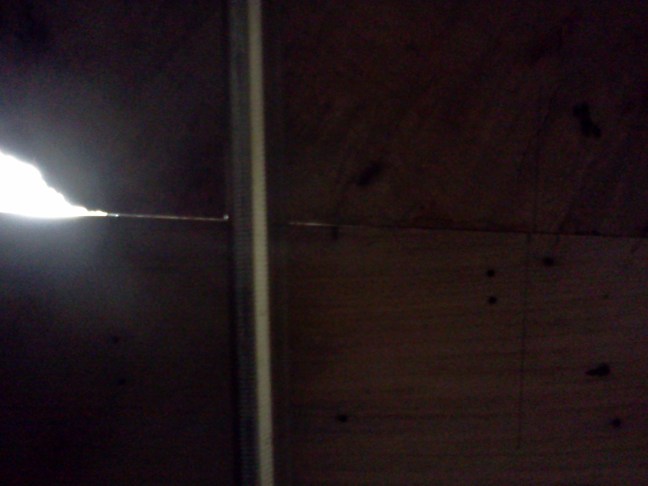
FlairWoodworks It’s this sliver of light that I’m trying to eliminate. #flairww -2:06 PM May 22nd, 2012
FlairWoodworks I summoned my super-human strength (actually I just took a break) but could not close the joint. #flairww -2:20 PM May 22nd, 2012
FlairWoodworks I’ll wedge the joint apart, tune it, and try again. #flairww -2:20 PM May 22nd, 2012
FlairWoodworks I took a 30-minute break to discuss a coalition between #woodchat and @MWA_National. Back to work on the table now. #flairww -3:02 PM May 22nd, 2012
FlairWoodworks Somebody made lunch so I’ll go eat now! #flairww -3:06 PM May 22nd, 2012
FlairWoodworks Back after lunch, I’ll work to take the two slabs apart so I can work on the fit. #flairww -3:56 PM May 22nd, 2012
FlairWoodworks Wedges are awesome! It was a lot easier to take the slabs apart with wedges than to put them together with clamps and a mallet. #flairww -4:03 PM May 22nd, 2012
FlairWoodworks There was nothing obvious preventing the joint from closing so I just cleaned it up a little. #flairww -4:08 PM May 22nd, 2012
FlairWoodworks Okay, I’m ready to try another dry-fit. #flairww -4:12 PM May 22nd, 2012
FlairWoodworks This time I was able to close the joint most of the way with my dead blow mallet. Now I’ll use clamps. #flairww -4:18 PM May 22nd, 2012
FlairWoodworks I like to hear creaking as I tighten the clamps, which indicates that something is moving and a gap is (hopefully) closing. #flairww -4:24 PM May 22nd, 2012
malphrusoxide @FlairWoodworks creaking >>> cracking. -4:27 PM May 22nd, 2012
FlairWoodworks Yes, that’s possible too. RT @malphrusoxide: @FlairWoodworks creaking >>> cracking. -4:32 PM May 22nd, 2012
malphrusoxide @FlairWoodworks oh, i was agreeing, saying creaking is much much better than cracking, ha ha. -4:33 PM May 22nd, 2012
FlairWoodworks I got the gap closed. This time, I also used a countertop connector which helped. #flairww -4:31 PM May 22nd, 2012

FlairWoodworks Now I’ll take the top apart once more while I ponder the question, “Am I ready to start the glue-up?” #flairww -4:37 PM May 22nd, 2012
FlairWoodworks And the slabs are apart once again. I’m getting good at this! #flairww -4:42 PM May 22nd, 2012
FlairWoodworks AM I READY….? #flairww -4:43 PM May 22nd, 2012
FlairWoodworks I like doing things that are challenging, but this project has pushed me more than most. #flairww -4:44 PM May 22nd, 2012
FlairWoodworks At this moment, it is as if I am about to jump out of a plane… #flairww -4:51 PM May 22nd, 2012
FlairWoodworks … Everything is in place for this to go smoothly… #flairww -4:53 PM May 22nd, 2012
FlairWoodworks …the next 15 minutes will feel like two minutes… #flairww-4:53 PM May 22nd, 2012
FlairWoodworks …and there’s a chance that things could go horribly wrong…#flairww -4:53 PM May 22nd, 2012
bltww @FlairWoodworks I felt the same way when I went to glue up my workbench. -4:53 PM May 22nd, 2012
FlairWoodworks …but I know I have to do it. The best thing to do is… to just go for it and not over-think it! #flairww -4:54 PM May 22nd, 2012
FlairWoodworks I’ll bet you did! #flairww RT @bltww: @FlairWoodworks I felt the same way when I went to glue up my workbench. -4:54 PM May 22nd, 2012
FlairWoodworks You can only prepare so much. Then you have to take action. #flairww -4:56 PM May 22nd, 2012
FlairWoodworks I jumped. See you on the other side. #flairww -4:56 PM May 22nd, 2012
FlairWoodworks EXHALE! #flairww -5:11 PM May 22nd, 2012
FlairWoodworks That went pretty well. It took about 14 minutes of intense action (I forgot to turn on the video camera). #flairww -5:15 PM May 22nd, 2012
FlairWoodworks The only unexpected challenge was having to deal with a glue clot that clogged the nozzle of my glue bottle. #flairww -5:16 PM May 22nd, 2012
FlairWoodworks I almost put the tail end of a clamp through the door of my microwave too. #flairww -5:16 PM May 22nd, 2012
FlairWoodworks This is what I set out to do today and I got it done. I’ll let the glue set for a day. #flairww -5:18 PM May 22nd, 2012
FlairWoodworks The countertop connectors equalize the force of three clamps. #flairww -5:21 PM May 22nd, 2012

kring_l @FlairWoodworks Nice work, go have a beer #TerrifyingGlueUps -5:33 PM May 22nd, 2012
FlairWoodworks I think I will! #flairww RT @kring_l: @FlairWoodworks Nice work, go have a beer #TerrifyingGlueUps -5:36 PM May 22nd, 2012
That was a very exciting session for me and I was glad to see it come together so well. I was intimidated by the task but succeeded. Have you ever had a woodworking task like this? Share it in the comments section.
After the glue dries, I’ll resurface the slab and start thinking about an edge profile.
Discover more from Products From The Mind of Chris Wong
Subscribe to get the latest posts sent to your email.

Curious about why you did not glue the top together ages ago? Always a chance things don’t line up after you have done all the fitting for the legs etc. Maybe you were waiting for something to move in the top?
Hi Morgan,
Good question. I suppose that by delaying the glue-up gave the top some extra time to acclimatize and adjust to the environment of my shop. But the real reason was that making and carving the base seemed more interesting, more familiar, and less intimidating.
Chris
Looks great. Agree that it could have been horrible at the last minute, but you’ve had this prepared well for a long time.
Nice use of the softwood wedges. I’ve used them before, but not like that to separate a dry-fit. But then normally I work with smaller stock!
Eager to see the top cleaned and polished up!