

On the morning of Sunday, April 15th, Morton and I exchanged ideas about trestle tables, spurred on by a recent sketch of a table on which he was working. That got me yearning to build a trestle table.
I documented my progress live on Twitter which was useful because each update had a time stamp so followers could see the rate at which I progressed. Here is a list of the previous Sessions:
Session 1 – Flat Boards are Boring;
Session 2 – Playing with Slabs;
Session 3 – From Two Slabs to One Table Top;
Session 4 – Clamping Odd Shapes and Sketching on Wood;
Session 5 – Routing Pockets for Battens;
Session 6 – Making Battens and Installing Countertop Connectors;
Session 7 – Installing Battens and Flattening the Underside;
Session 8 – Make Your Tools Work for You and Flattening the Top;
Session 9 – Mortises the Slow Way (or Why I’m Buying a Domino XL);
Session 10 – Curvy Legs are Always Good;
Session 11 – Straight Lines on Wonky Surfaces;
Session 12 – Fitting the Mother of all Mortise & Tenon Joints;
Session 13 – Making Things Better, Worse, then Better;
Session 14 – Battens and Complicated Tenons, Again;
Session 15 – The Trestle Comes Together Session;
Session 16 – Angled Mortises and Tenons;
Session 17 – Two Feet for Two Legs;
Session 18 – Attachment Strips and Power Carving;
Session 19 – Refining the Sculpted Base;
Session 20 – A Little Sanding, then Lots More Sanding;
Session 21 – Preparing for a Big Glue-Up; and
Session 22 – Fitting and Joining the Table Top.
(If you are not familiar with the format used on Twitter, every update, or “tweet” below starts with a username, being the author of that tweet. Sometimes, you see two or more usernames in a tweet. The second (and third, etc) usernames are preceded by a @ symbol and are people to whom the author is talking. The other symbol you see is #, which serves as a category. I try to remember to categorize all my tweets pertaining to this project under #flairww.)

FlairWoodworks I’m back at work on the table after a full day working on Time Warp Tool Works projects. #flairww -2:19 PM May 24th, 2012
FlairWoodworks I can finally remove these long clamps under which I’ve been constantly crawling. #flairww -2:21 PM May 24th, 2012

FlairWoodworks An unexpected setback – I killed the output of my stereo. I blame @hailthevillain #flairww -2:29 PM May 24th, 2012
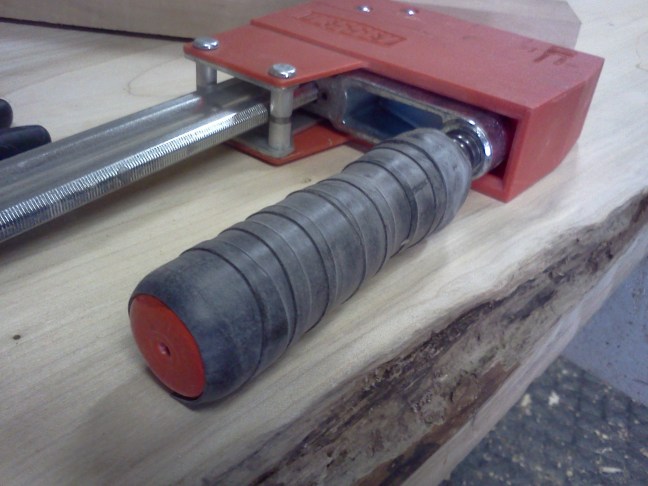
FlairWoodworks I wrapped the shiny red handle with a strip of a bicycle inner tube. Remember: shiny handles suck. #flairww -2:46 PM May 24th, 2012
FlairWoodworks With the pressure of the clamps gone, I can remove the glue squeeze-out and reflatten the surface. #flairww -2:58 PM May 24th, 2012

FlairWoodworks My Stanley Bailey #6 isn’t tuned as well as a smoother but it doesn’t need to be. #flairww -3:02 PM May 24th, 2012

FlairWoodworks I’m using a hand plane to refine the visible surfaces of the battens. #flairww -3:12 PM May 24th, 2012

FlairWoodworks Both battens are nicely refined. Now I’ll sand the underside of the table top to 180-grit before attaching the battens. #flairww -3:20 PM May 24th, 2012
FlairWoodworks I spent an hour on the phone with an engraver friend. (Anybody have an engraved tool?) Now I’ll begin sanding. #flairww -4:37 PM May 24th, 2012
FlairWoodworks The glue-up and handling resulted in a few dings so I went back to 80-grit to remove them. Now I’m uisng 120-grit. #flairww -4:49 PM May 24th, 2012
FlairWoodworks I’ve sanded the surface to 120-grit. I’m not going to go to 180-grit at this point. Now I’ll work on the edge. #flairww -5:19 PM May 24th, 2012

FlairWoodworks I used my jack plane to fair the convex section and spokeshave to fair the concave section of the edge. #flairww -5:22 PM May 24th, 2012
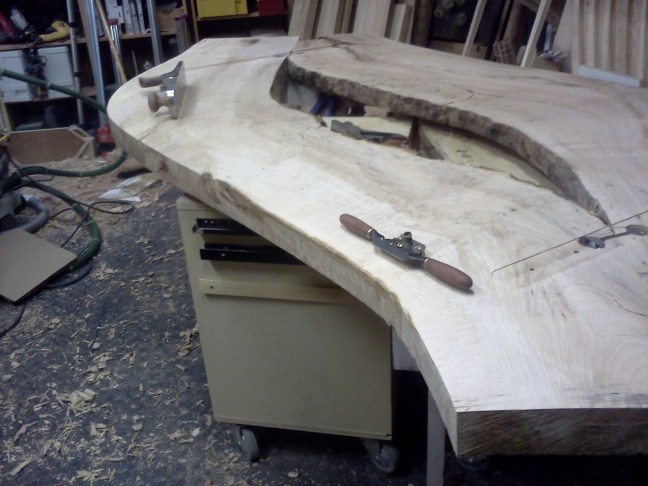
This video shows how I used my low-angle jack plane to fair the convex edge. (Duration – 0:53)
FlairWoodworks This section will make profiling the edge more difficult, but also will make the end result more impressive. #flairww -5:23 PM May 24th, 2012
HalfInchShy That edge will look fantastic with a finish @FlairWoodworks #flairww -5:29 PM May 24th, 2012
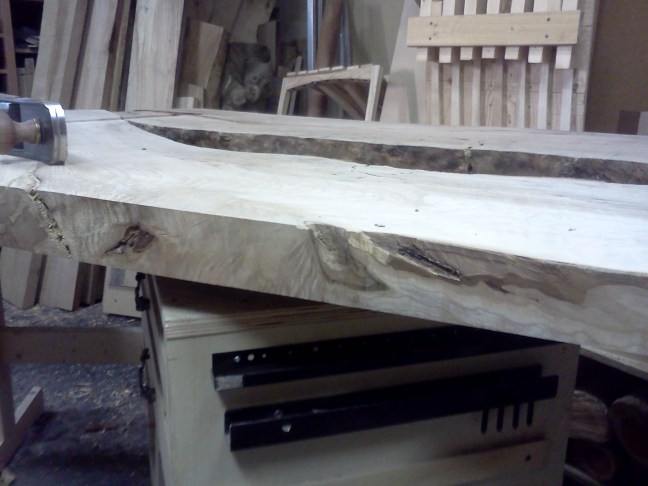
FlairWoodworks Unsure of which profile I want, I added a mild chamfer to the edge. Hmm… #flairww -5:34 PM May 24th, 2012
FlairWoodworks The edge definitely needs something to visually lighten it. #flairww -5:34 PM May 24th, 2012
HalfInchShy Maybe sculpt some undulations in place of the chamfer, they can go deep, but not far into the top surface @FlairWoodworks #flairww -5:36 PM May 24th, 2012
HalfInchShy Or maybe the same idea, but the undulations from underneath @FlairWoodworks #flairww -5:36 PM May 24th, 2012
FlairWoodworks I’ve use bevels top and bottom of varying sizes before, like on Table with a Twist. #flairww-5:37 PM May 24th, 2012
BCcraftmaster @FlairWoodworks twist it like the aprons on that other sick table you built! -5:37 PM May 24th, 2012
FlairWoodworks Neat idea. I had thought of a wavy edge. RT @HalfInchShy: Maybe sculpt some undulations in place of the chamfer @FlairWoodworks #flairww -5:38 PM May 24th, 2012
HalfInchShy Something like that would work if the bevels are shallow; don’t think making them steep would do it @FlairWoodworks #flairww -5:38 PM May 24th, 2012
FlairWoodworks I don’t think the slabs suit it. RT @BCcraftmaster: @FlairWoodworks twist it like the aprons on that other sick table you built! -5:39 PM May 24th, 2012
HalfInchShy sorry… ‘something like that’ has ‘Table with a Twist’ as the antecedent @FlairWoodworks #flairww -5:39 PM May 24th, 2012
MansFineFurn: @FlairWoodworks semi-parabolic cove underneath-5:41 PM May 24th, 2012
FlairWoodworks I was thinking of that… #flairww RT @MansFineFurn: @FlairWoodworks semi-parabolic cove underneath-5:41 PM May 24th, 2012
FlairWoodworks @HalfInchShy Careful! I have a piece titled, Something Like That! #flairww -5:42 PM May 24th, 2012
BCcraftmaster @FlairWoodworks how about a bottom bevel to give it a thinner look. Like this -5:46 PM May 24th, 2012

FlairWoodworks @BCcraftmaster Yes, that’s a possibility. #flairww-5:47 PM May 24th, 2012
FlairWoodworks While I ponder the shape, I’m going to go get some lunch. #flairww -5:48 PM May 24th, 2012
BCcraftmaster @FlairWoodworks I saw T-mac do it on one of his tables and used it on my fireplace mantle and entertainment center – 5:50 PM May 24, 2012

DyamiPlotke @FlairWoodworks I like the chamfer. -6:06 PM May 24, 2012
HalfInchShy Great, you’ll come back and shape it like a burger… RT @FlairWoodworks: While I ponder the shape, I’m going to go get some lunch. #flairww -6:14 PM May 24th, 2012
FlairWoodworks I’m not sure whether I’ll go wth a chamfer or round-over profile. I don’t like the idea of a concave profile. #flairww -6:15 PM May 24th, 2012
MansFineFurn @FlairWoodworks boooooo ;) -6:15 PM May 24th, 2012
FlairWoodworks @MansFineFurn You like the idea of a hollow? #flairww -6:18 PM May 24th, 2012
MansFineFurn @FlairWoodworks yup, underside hollow makes the edge appear thin (lightweight) rather than appearing as a feature in itself…. -6:19 PM May 24th, 2012
FlairWoodworks @HalfInchShy Hmm… a hamburger bun has a nice shape… #flairww -6:19 PM May 24th, 2012
MansFineFurn @FlairWoodworks …you have lots of other features to showcase on that, the edge should be subtle, and lightweight -6:20 PM May 24, 2012
FlairWoodworks @MansFineFurn A bevel on the underside has the same effect without disappearing entirely. #flairww -6:22 PM May 24th, 2012
MansFineFurn @FlairWoodworks yes, but your whole table has curvature, a chamfer doesn’t seem to fit the theme (stands out, and not in a good way IMHO [in my honest opinion]) -6:23 PM May 24, 2012
FlairWoodworks @MansFineFurn So the question is: would a chamfer provide good or bad contrast? #flairww -6:26 PM May 24th, 2012
MansFineFurn @FlairWoodworks I can only say in my opinion, it would stand out. which (I think) is not where you’d like the focus to be on this piece -6:28 PM May 24th, 2012
FlairWoodworks I have some offcuts from the table top on which I can experiment. #flairww -6:28 PM May 24th, 2012
HalfInchShy What about a wavy edge? like Flow. In my mind, it doesn’t look good, though @FlairWoodworks #flairww -6:28 PM May 24th, 2012
FlairWoodworks @HalfInchShy No, I wouldn’t want a wavy edge like on Flow. #flairww -6:30 PM May 24th, 2012
MansFineFurn @FlairWoodworks damn, a design hangout would be awesome right about now. -6:30 PM May 24th, 2012
FlairWoodworks @MansFineFurn You are right – the edge should not compete for attention. #flairww -6:32 PM May 24th, 2012
BCcraftmaster @FlairWoodworks @MansFineFurn @HalfInchShy @DyamiPlotke sure. I’m creating a g+ accredited now -6:37 PM May 24th, 2012
MansFineFurn @FlairWoodworks I may be able to: If I show up, I’ll be there #captainobvious -6:38 PM May 24th, 2012
FlairWoodworks I’m back in the shop and going to cut up an offcut from the table for testing profiles. #flairww -6:47 PM May 24th, 2012
FlairWoodworks Are you on G+? Join my Hangout and help me design an edge profile for the table! Link #flairww -6:54 PM May 24th, 2012
FlairWoodworks I’m going to profile the edges as well as the ends, so I need to cut the ends first. #flairww -7:15 PM May 24th, 2012
FlairWoodworks I also need to fair the other edge of the table. #flairww -7:15 PM May 24th, 2012
FlairWoodworks I had one design Hangout with @MansFineFurn and@DyamiPlotke earlier and one with @BCcraftmaster just now. They were a great help! #flairww -8:07 PM May 24th, 2012
FlairWoodworks I’ve dressed a scrap of maple the same thickness as the table top. I’ll use it as a test for the profile. #flairww -8:08 PM May 24th, 2012
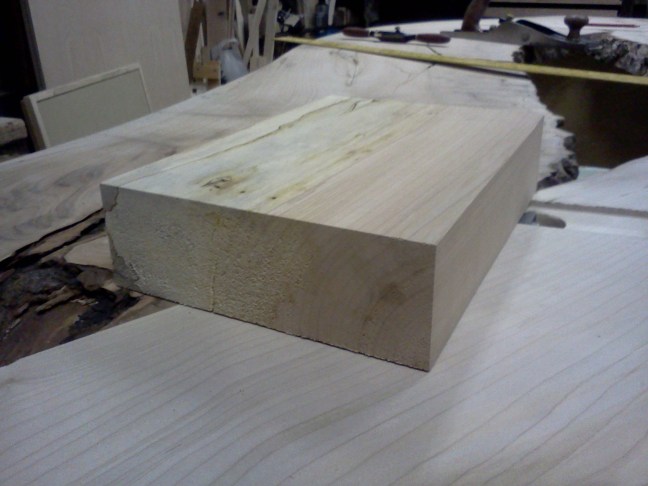
FlairWoodworks This is the profile I want to use on the edge. I’ll rough it out with my table saw. #flairww -8:09 PM May 24th, 2012

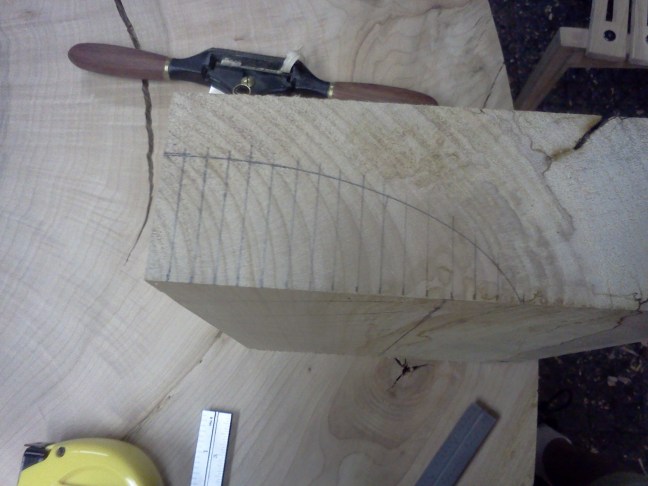
FlairWoodworks I redrew the curve with perpendicular lines every 1/4″ to aid in setting the table saw blade height. #flairww -8:18 PM May 24th, 2012
FlairWoodworks Here is the kerfed block. This process is similar to using a rabbet plane before hollows and rounds. #flairww -8:42 PM May 24th, 2012

FlairWoodworks Cutting all the grooves requires getting into a rhythm. If you break the rhythm, you might need to start again. #flairww -8:44 PM May 24th, 2012
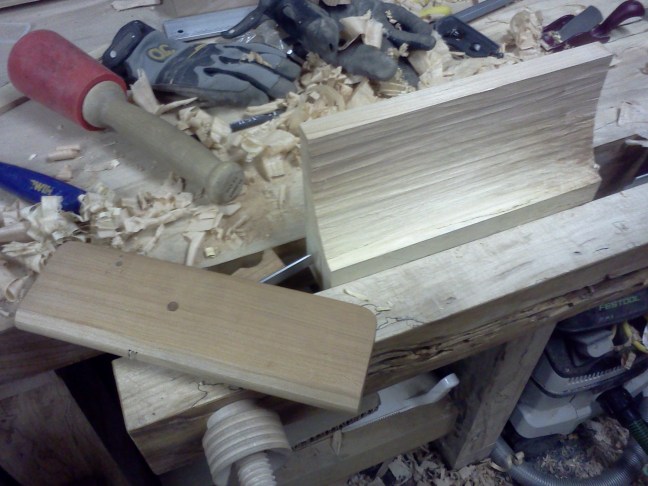
FlairWoodworks I broke away most of the waste with a mallet. #flairww -8:50 PM May 24th, 2012

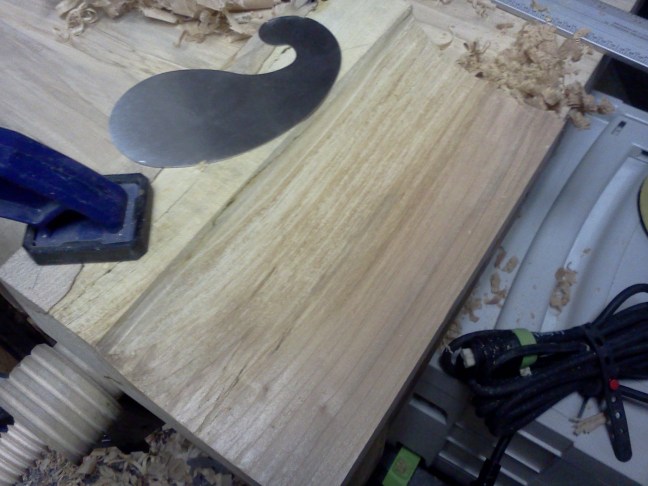
FlairWoodworks I used a gouge to refine the surface. The convex plane will finish the job. #flairww -8:57 PM May 24th, 2012

FlairWoodworks Luckily I have a full set of Time Warp Tool Works moulding planes. The #8 round worked perfectly! #flairww -9:13 PM May 24th, 2012
FlairWoodworks I could use either a scraper or sander to smooth the curve. #flairww -9:17 PM May 24th, 2012
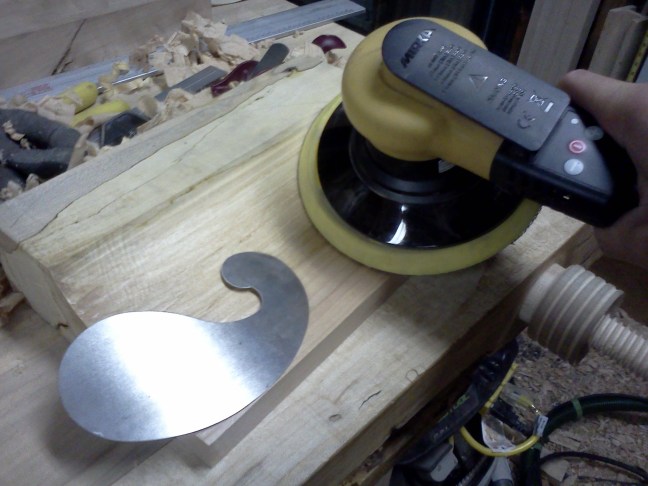
FlairWoodworks The scraper worked quickly to even out the surface. #flairww -9:29 PM May 24th, 2012
FlairWoodworks As is often the case with mouldings, the last inch or so isn’t as consistent as the rest. #flairww -9:31 PM May 24th, 2012

FlairWoodworks I think this is going to look awesome. Good call, Nick! @mansfinefurn #flairww -9:33 PM May 24th, 2012

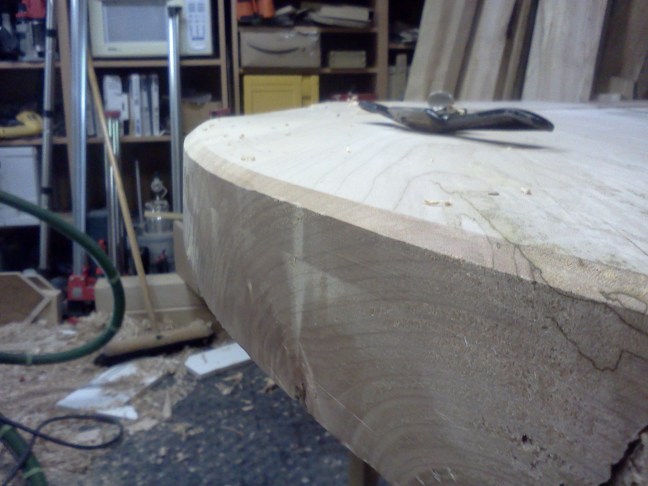
FlairWoodworks The last thing I’ll do in the shop tonight is draw the curves along which I’ll cut the table ends. #flairww -9:46 PM May 24th, 2012
FlairWoodworks I drew two lines square to each edge that intersected at an point (where the pencil is). #flairww -10:02 PM May 24th, 2012
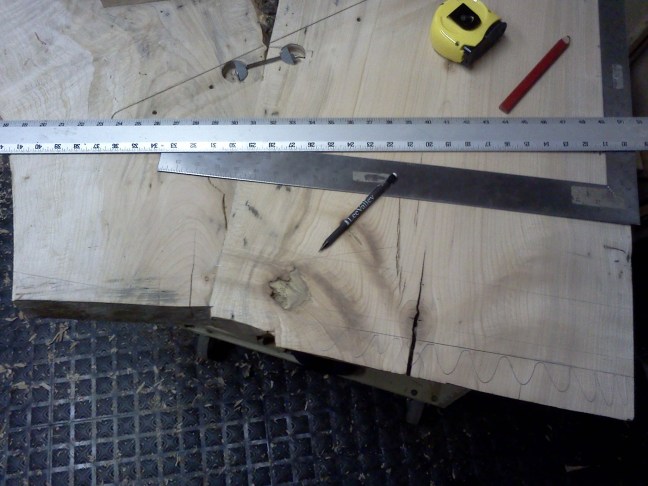
FlairWoodworks Then I drew a line between the two ends of the lines. #flairww -10:04 PM May 24th, 2012
FlairWoodworks I’m looking at pictures from Session 4 to figure out what curve I like. #flairww -10:05 PM May 24th, 2012
FlairWoodworks Here are three curves I’d drawn in Session 4. I’m only looking at the curvature, not the positioning. #flairww -10:07 PM May 24th, 2012

HalfInchShy Just got back; would have been a fun hangout. I like the thumbnail cove you decided on @FlairWoodworks #flairww -10:10 PM May 24th, 2012
HalfInchShy Now, to find a router bit that big… =:-O @FlairWoodworks #flairww -10:11 PM May 24th, 2012
FlairWoodworks Thanks! RT @HalfInchShy: Just got back; would have been a fun hangout. I like the thumbnail cove you decided on @FlairWoodworks #flairww -10:12 PM May 24th, 2012
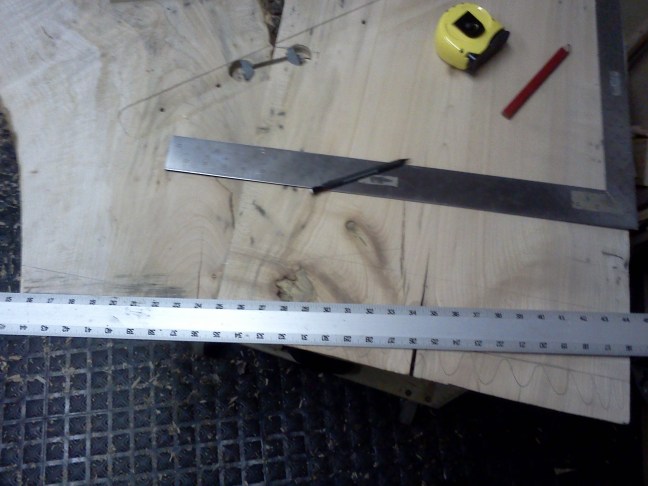
FlairWoodworks This curve has 1-1/2″ of bow. I like it. #flairww -10:14 PM May 24th, 2012
FlairWoodworks I’ve laid out the curve on the other end too. #flairww -10:24 PM May 24th, 2012

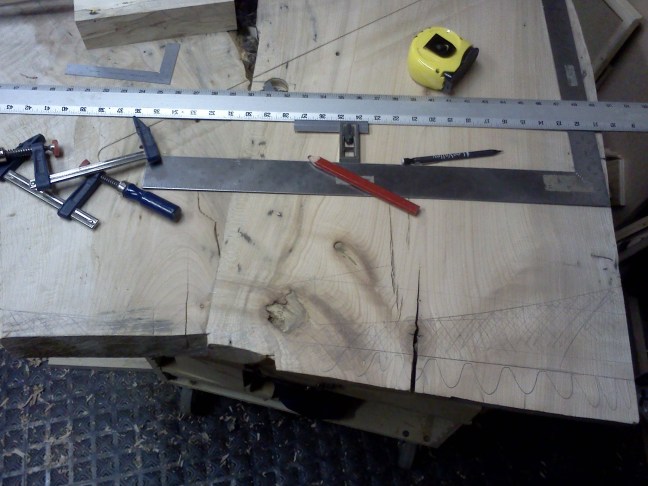
FlairWoodworks I added a piece of tape to guide me across the void. #flairww -10:26 PM May 24th, 2012

FlairWoodworks I’m considering making a template to rout the ends evenly because tuning end-grain isn’t much fun. #flairww -10:35 PM May 24th, 2012
FlairWoodworks I used a CAD program to calculate the radius of the arcs which I laid out. They have a radius of 74-7/8″. #flairww -10:35 PM May 24th, 2012
FlairWoodworks I could always cut close to the line and fair the curve. That wouldn’t be that difficult. #flairww -10:39 PM May 24th, 2012
FlairWoodworks Tuning the two cuts with my random orbit sander should be easier than making a template. That’s what I’ll do next time. #flairww -10:41 PM May 24th, 2012
FlairWoodworks I’m done in the shop for today. Thanks for following! #flairww -10:43 PM May 24th, 2012
luggermatt @FlairWoodworks Another fabulous day! Thanks for posting :-) -10:43 PM May 24th, 2012
FlairWoodworks Thanks! I’m appreciative of all the interest that’s been shown. RT @luggermatt: @FlairWoodworks Another fabulous day! Thanks for posting :-) -10:46 PM May 24th, 2012
FlairWoodworks When designing the edge profile, I forgot about the battens. This one is in the way. #flairww-11:19 PM May 24th, 2012
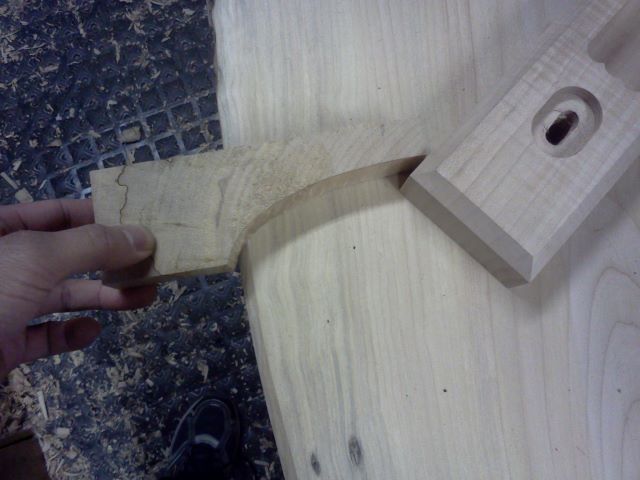
FlairWoodworks I could either shorten the length of the edge profile or shorten the batten. Or I could do both. #flairww -11:20 PM May 24th, 2012
In the next session, I’ll cut the ends of the table and work on profiling the edges.
What do you think of the profile? Does it suit the table? Or do you think a round-over profile or another shape would look better? Leave me a comment!
Discover more from Products From The Mind of Chris Wong
Subscribe to get the latest posts sent to your email.

The table is looking great, Chris. I can’t wait to see the top finished up.
Chris you profile might be nicer if you reduced the length of the profile. Does it need to be 5″? Won’t it get lost if it is to long. I don’t see a pic of your sample orientated so you can visualize it in situ… I am afraid when you finish it will just look like a 3/4 slab….!!
I’m with Morgan; may not need such a deep cove or leaving such a relatively thin edge. The shape of the cove is nice if that sweep is maintained.