

On the morning of Sunday, April 15th, Morton and I exchanged ideas about trestle tables, spurred on by a recent sketch of a table on which he was working. That got me yearning to build a trestle table.
I documented my progress live on Twitter which was useful because each update had a time stamp so followers could see the rate at which I progressed. Here is a list of the previous Sessions:
Session 1 – Flat Boards are Boring;
Session 2 – Playing with Slabs;
Session 3 – From Two Slabs to One Table Top;
Session 4 – Clamping Odd Shapes and Sketching on Wood;
Session 5 – Routing Pockets for Battens;
Session 6 – Making Battens and Installing Countertop Connectors;
Session 7 – Installing Battens and Flattening the Underside;
Session 8 – Make Your Tools Work for You and Flattening the Top;
Session 9 – Mortises the Slow Way (or Why I’m Buying a Domino XL);
Session 10 – Curvy Legs are Always Good;
Session 11 – Straight Lines on Wonky Surfaces;
Session 12 – Fitting the Mother of all Mortise & Tenon Joints;
Session 13 – Making Things Better, Worse, then Better;
Session 14 – Battens and Complicated Tenons, Again;
Session 15 – The Trestle Comes Together Session;
Session 16 – Angled Mortises and Tenons;
Session 17 – Two Feet for Two Legs;
Session 18 – Attachment Strips and Power Carving;
Session 19 – Refining the Sculpted Base;
Session 20 – A Little Sanding, then Lots More Sanding;
Session 21 – Preparing for a Big Glue-Up;
Session 22 – Fitting and Joining the Table Top; and
Session 23 – The Bottom of the Top.
(If you are not familiar with the format used on Twitter, every update, or “tweet” below starts with a username, being the author of that tweet. Sometimes, you see two or more usernames in a tweet. The second (and third, etc) usernames are preceded by a @ symbol and are people to whom the author is talking. The other symbol you see is #, which serves as a category. I try to remember to categorize all my tweets pertaining to this project under #flairww.)

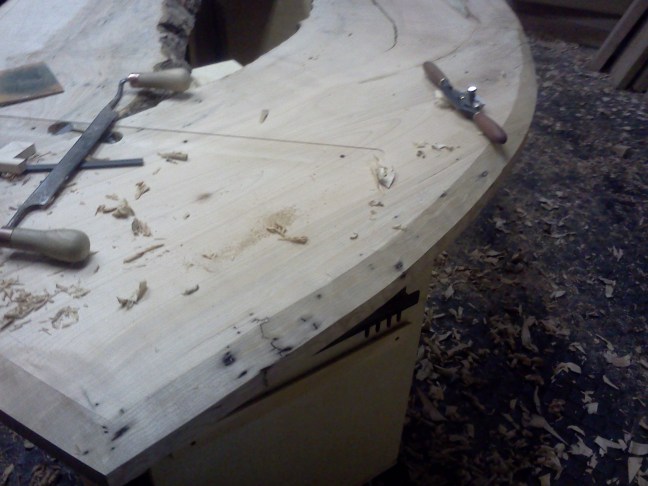
FlairWoodworks Welcome to Session 24! I’ll continue work on the Maple Trestle Table by cutting the ends, then working on the edge profile. #flairww -12:48 PM May 27th, 2012
FlairWoodworks I’m ready to make the first cut. #flairww -12:58 PM May 27th, 2012

FlairWoodworks I cut the curve with my jigsaw. Now I’m using my low-angle block plane to clean up and fair the curve. #flairww -1:22 PM May 27th, 2012

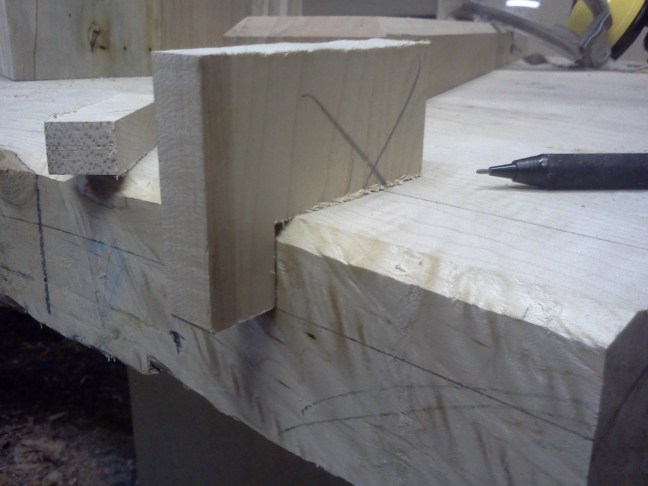
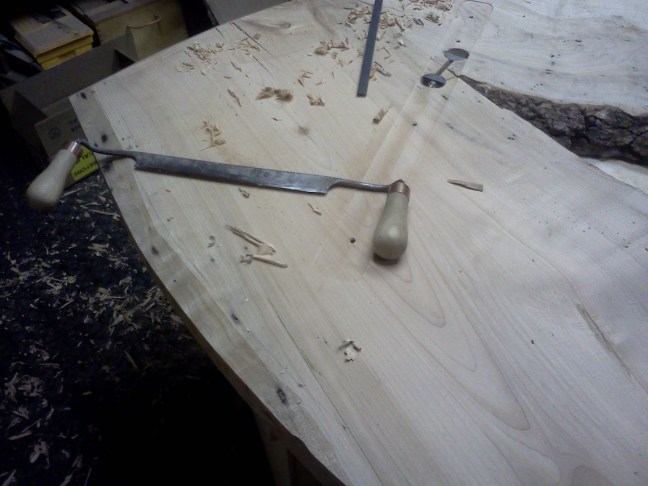
FlairWoodworks This joint is nice and tight. #flairww -1:25 PM May 27th, 2012

gvmcmillan @FlairWoodworks Now THAT’S a joint! How thick is the wood there again? -1:29 PM May 27th, 2012
FlairWoodworks It’s 2-1/8″ thick. #flairww RT @gvmcmillan:@FlairWoodworks Now THAT’S a joint! How thick is the wood there again? -1:29 PM May 27th, 2012
gvmcmillan @FlairWoodworks That’s substantial – what did you use to make that much thickness so perfect? Surely not a hand plane? -1:31 PM May 27, 2012
FlairWoodworks @gvmcmillan I used a router to get it close, then a handplane to get it perfect. #flairww -1:32 PM May 27th, 2012
FlairWoodworks The curve looks and feels fair. Therefore, it must be fair. #flairww -1:38 PM May 27th, 2012

FlairWoodworks Now I’ll cut the other end. #flairww -1:39 PM May 27th, 2012
FlairWoodworks Here’s another angle of the cut end. #flairww -1:40 PM May 27th, 2012

FlairWoodworks When using the jigsaw upside-down, I find it helpful to carry the cut line down the edge. #flairww -1:49 PM May 27th, 2012

FlairWoodworks I completed the cut. I have more control with the jigsaw set to not orbit. #flairww -1:58 PM May 27th, 2012

FlairWoodworks Again, I’m using my block plane to fair the curve. The light areas are the low spots. #flairww-2:21 PM May 27th, 2012
FlairWoodworks The end curves are fair. The next step is to lay out the edge profile. #flairww -2:28 PM May 27th, 2012

DyamiPlotke @FlairWoodworks have you figured it out? -2:31 PM May 27th, 2012
FlairWoodworks @DyamiPlotke All the edge profiles in the base are convex, as are the ends of the table. I want to mimic the profile of the legs. #flairww -2:34 PM May 27th, 2012
DyamiPlotke @FlairWoodworks good plan. -2:40 PM May 27th, 2012
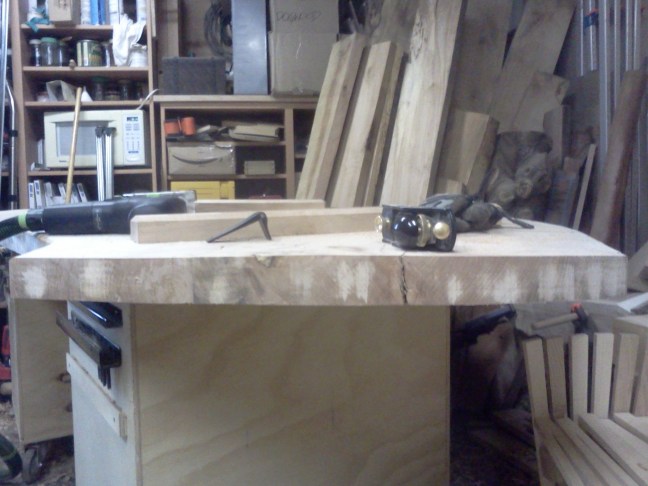
FlairWoodworks Before I start profiling the edge, I’m going to tidy up the shop. #flairww -2:47 PM May 27th, 2012

FlairWoodworks I unscrewed the particle board cauls. The materials may be reused or tossed. #flairww -2:48 PM May 27th, 2012

FlairWoodworks I’ve used more than 22 sanding discs so far. They cost about a buck each. #flairww -3:03 PM May 27th, 2012

DyamiPlotke @FlairWoodworks they don’t seem very long lived -3:07 PM May 27th, 2012
FlairWoodworks @DyamiPlotke Some still have life in them, but they do tend to wear quickly when working on sculpted surfaces. #flairww -3:08 PM May 27th, 2012
Tumblewood @FlairWoodworks @DyamiPlotke Yea, it seems a big difference between finishing a surface and creating a surface, in terms of longevity. -3:09 PM May 27th, 2012
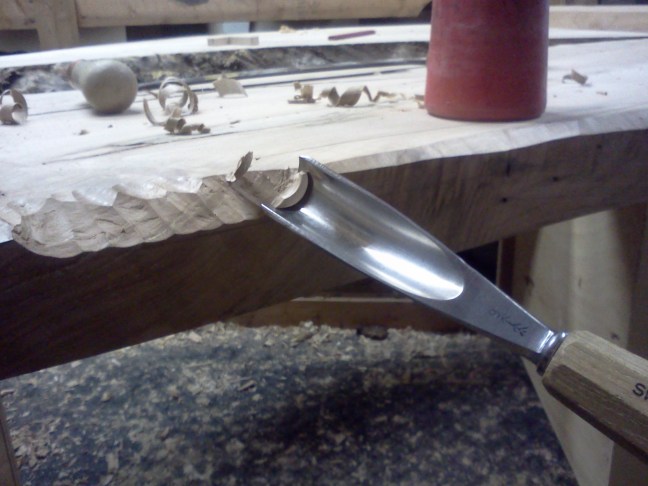
FlairWoodworks To cut the edge profile evenly, I’m going to first cut a wide bevel. #flairww -3:27 PM May 27th, 2012
FlairWoodworks To lay out the bevel, I made two simple jigs. They guide a pencil to draw a line parallel to the edges. #flairww -3:29 PM May 27th, 2012

FlairWoodworks The second jig marks the other guideline. #flairww -3:41 PM May 27th, 2012
FlairWoodworks I’ve started establishing the end bevel with my biggest gouge and a mallet. #flairww -3:51 PM May 27th, 2012

gvmcmillan @FlairWoodworks Yep, that’s a pretty big gouge! My biggest is 1″ -4:00 PM May 27th, 2012
Tumblewood @FlairWoodworks are you still going for a cove vs a bevel? I can’t think of an expedient way to do that. #flairww
FlairWoodworks @gvmcmillan This one is a 9/25 (#9 sweep, 25mm mm wide, for the non-carvers). #flairww -4:03 PM May 27th, 2012
FlairWoodworks @Tumblewood No, I’m doing an elliptical roundover. #flairww -4:03 PM May 27th, 2012
FlairWoodworks @Tumblewood The quickest way to make a large cove on something like this table top would be a series of passes with a router… #flairww -4:04 PM May 27th, 2012
FlairWoodworks @Tumblewood … then sandpaper to finish. #flairww -4:04 PM May 27th, 2012
Tumblewood @FlairWoodworks oh cool. The round over would’ve been my choice, too. #flairww -4:10 PM May 27th, 2012
gvmcmillan @FlairWoodworks I think I’d be tempted to knock of the largest bits with my jig saw set at a 45 degree angle. #flairww -4:11 PM May 27th, 2012
FlairWoodworks @gvmcmillan The only trouble with that is the bevel angle is a 1:2 rise/run ratio. #flairww -4:11 PM May 27th, 2012
Tumblewood @FlairWoodworks yea with a big cove bit. Would still require a LOT of extra work. #flairww -4:11 PM May 27th, 2012
gvmcmillan @FlairWoodworks Yes, but, ahem, who decided that? ;) #flairww -4:12 PM May 27th, 2012
FlairWoodworks @Tumblewood Some extra work for sure. How would it be compared to the alternatives? #flairww -4:13 PM May 27th, 2012
Tumblewood @FlairWoodworks I think your approach melds w/ the base very well. #flairww -4:15 PM May 27th, 2012
FlairWoodworks Thanks, Vic! I do too. RT @Tumblewood:@FlairWoodworks I think your approach melds w/ the base very well. #flairww -4:16 PM May 27th, 2012
FlairWoodworks I’ve used the gouge to remove most of the waste. #flairww -4:33 PM May 27th, 2012
FlairWoodworks Now I’m using a coarsely-set block plane across the grain to refine the bevel. #flairww -4:34 PM May 27th, 2012

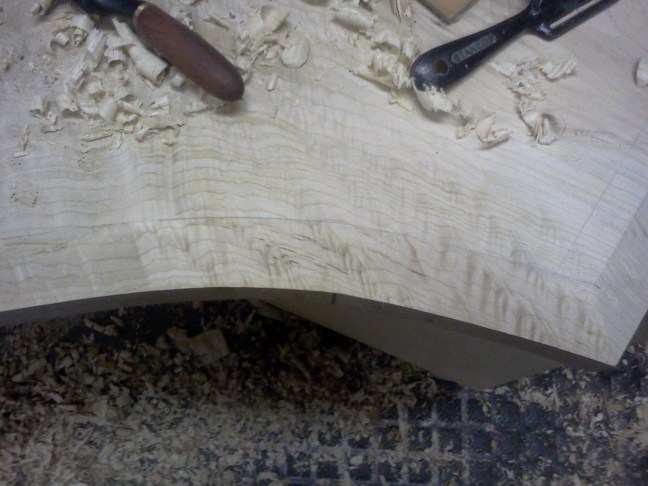
FlairWoodworks Here’s the first bevel completed. I’ll do the other end next. #flairww -4:45 PM May 27th, 2012

FlairWoodworks As I’m wasting away the bevel with my gouge and mallet, “Wasting Away” by The Northern Pikes started to play! #flairww -4:47 PM May 27th, 2012
Tumblewood @FlairWoodworks SWEET! #flairww -4:50 PM May 27th, 2012
FlairWoodworks When chopping away waste, it does not make sense to be timid. When the chips break free, they fly 4-6′ from the table. #flairww -4:56 PM May 27th, 2012
FlairWoodworks I cannot believe how long this gouge stays sharp. #flairww -5:00 PM May 27th, 2012

FlairWoodworks The second end is shaped. I’m tired and hungry so I’m stopping for lunch. #flairww -5:14 PM May 27th, 2012

DyamiPlotke: @FlairWoodworks what brand? -5:43 PM May 27th, 2012
FlairWoodworks My gouge is a Pfeil (a.k.a. Swiss-Made). #flairww RT @DyamiPlotke: @FlairWoodworks what brand? -5:44 PM May 27th, 2012
FlairWoodworks After a delicious lunch, I’m back at work on the edges of the table. I’m going to work on the long edges next. #flairww -6:19 PM May 27th, 2012
FlairWoodworks The curves present a little bit of a challenge but mostly they will make progress slower. #flairww-6:23 PM May 27th, 2012

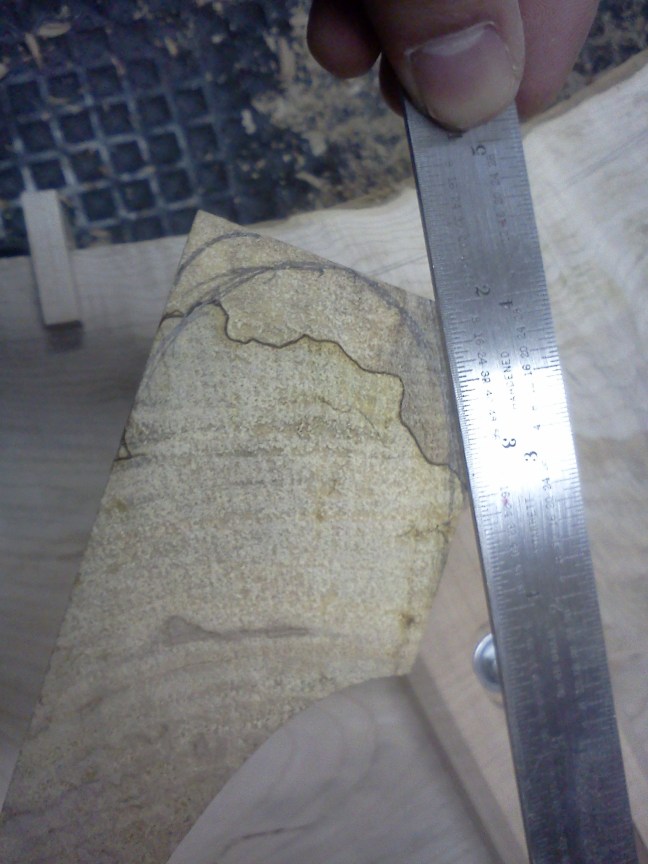
FlairWoodworks The difficult figure won’t help either. #flairww -6:24 PM May 27th, 2012

FlairWoodworks My drawknife works quickly to remove most of the waste. #flairww -6:30 PM May 27th, 2012
FlairWoodworks I cleaned up the edge with my flat spokeshave. #flairww -6:40 PM May 27th, 2012
FlairWoodworks As I expected, this section is difficult to work. #flairww -6:43 PM May 27th, 2012

FlairWoodworks The best way I’ve found to work this section is to use the gouge to chop into the edge. #flairww -6:47 PM May 27th, 2012
FlairWoodworks My right arm is sore from swinging my 12oz carver’s mallet but the gouge work is done here. #flairww -6:56 PM May 27th, 2012

FlairWoodworks I’ve got one long bevel done. Next! #flairww -7:29 PM May 27th, 2012

woodshaver101 @FlairWoodworks A draw knife would do wonders on such a large bevel.looking good. -8:04 PM May 27th, 2012
FlairWoodworks Thanks! This is a lot of work! #flairww RT @woodshaver101: @FlairWoodworks A draw knife would do wonders on such a large bevel.looking good. -8:05 PM May 27th, 2012
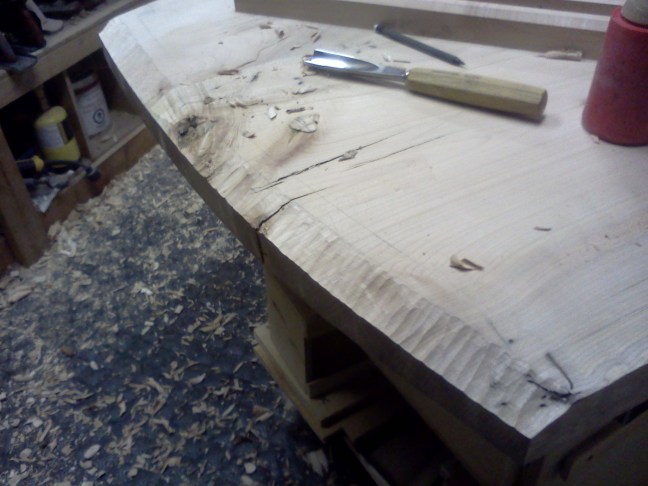
FlairWoodworks I just finished the difficult (and beautiful) section on this edge. #flairww -8:06 PM May 27th, 2012

BCcraftmaster @FlairWoodworks that looks great with the curve of the flitch -8:07PM May 27th, 2012
Tumblewood @FlairWoodworks looks awesome! #flairww -8:11 PM May 27th, 2012
FlairWoodworks I’m just glad my spokeshaves can handle this grain! #flairww -8:12 PM May 27th, 2012

FlairWoodworks I resorted to the gouge for this heavily-figured section. #flairww -8:25 PM May 27th, 2012

FlairWoodworks When the grain is this figured, is it any wonder it took so long to shape? The bevel is complete. #flairww -8:33 PM May 27th, 2012
FlairWoodworks I’m done work for now. Next, the bevels will turn into gentle curves. #flairww -8:34 PM May 27th, 2012
In the next session, I’ll continue working on the bottom half of the edge profile. You can leave a comment here.
Discover more from Products From The Mind of Chris Wong
Subscribe to get the latest posts sent to your email.

I don’t know … butI think the bevel would ake a nice contrast to the smooth curves of the base….
Hi Stephen,
Thanks for the comment. The bevels are only the first stage of the profile. They will help guide me to create an even elliptical round-over.
Chris
Nice work and now we’re seeing the outstanding grain in that slab up close (well, you closer :)
Hey Chris.. Table is coming along great!
I was curious how much you are charging, as it’s been 6 weeks of taking up space in your shop.. Have you tracked the hours?
Also, no jumping out of planes mid project! Haha … Waiting with baited breath to see it completed…
Mike
Hi Mike,
Thanks for the comment. I have not yet determined the price, though early on, it was joked that the price at that point was a Festool Domino XL and router. The price will be established once I see the table completed. One thing I’ve learned is that something unique like this table cannot be priced using forumlas as can be done with kitchen cabinets. Every hour put into this table has been tracked in the Sessions (and on Twitter). Care to count them up for me?
Chris
Haha.. No I would not care to count them.. Sorry…
I know pricing a table like this is difficult.. That’s why I was curious.. I also don’t want to see you undercut yourself , although we are all guilty of fussing over the details and doing the little extras that make us happy, bit the customer doest really appreciate the time ti do them( or really have any idea of the actual time involved to make things as well as we do) I am also interested in buying some wood from you or your source( Dave?) let me know if that’s possible. Thanks
Check your e-mail, Mike.
Chris,
I’m speechless. I was wondering though, when you first attacked it with the gouge, were you considering leaving the gouging as the profile. I thought it gave flair. Chamfer looks good too, as well I’m sure the round over will. The chamfer makes it look a little manufactured vs created if that makes sense. Anyhow, great work!