

During Artwalk, I showed my work in Gallery Bistro (2411 Clarke Street) with three other artists: Bronwen Belenkie, Clive Tucker and Mandara Lebovitz. Our exhibition will continue through April 28th. The gallery is open 10am-3pm Tuesday through Sunday.
Last week, I spent three days at Lee Valley Tools Ltd. demonstrating joinery techniques. I took the opportunity to hone my skills and try some new ideas.
The first joint I cut was a through dovetail. I cut both the pins and tails over-length, then rounded their edges. I was using a Japanese dovetail chisel that had sides ground so that they came to a point on the top of the chisel. That point left marks as I used the tool bevel-down to sculpt the joint – something that I hadn’t foreseen.

Next, I cut a half-lap joint. These joints were really simple to make – I just placed one piece on the other, marked its position with a knife, then removed the waste between the lines to a depth equal to half the stock’s thickness. Then I repeated the process for the other part. I made the angled joint to demonstrate that when using hand tools, it was just as simple to work with angles – the process is the same.

After having warmed up with the easy joints, I tried some more advanced joinery. For my next performance, I started by cutting a blind mortise, leaving 1/4″ of material at the bottom of the mortise. Then I laid out and cut a design at the bottom of the mortise using a fret saw.

I cut and fit the tenon, then inserted it into the mortise as far as it could go. I then used a pencil to trace the shape of the letters onto the end of the tenon, then used a saw and chisels to carve out the letters.
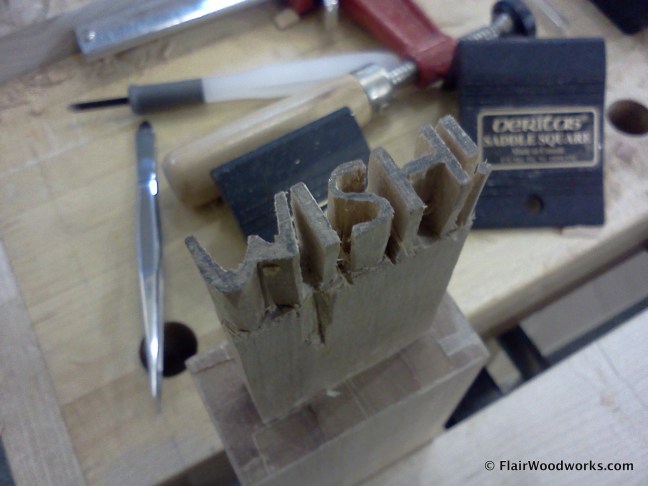 Then I drove the tenon home and the letters slid through the end of the mortise.

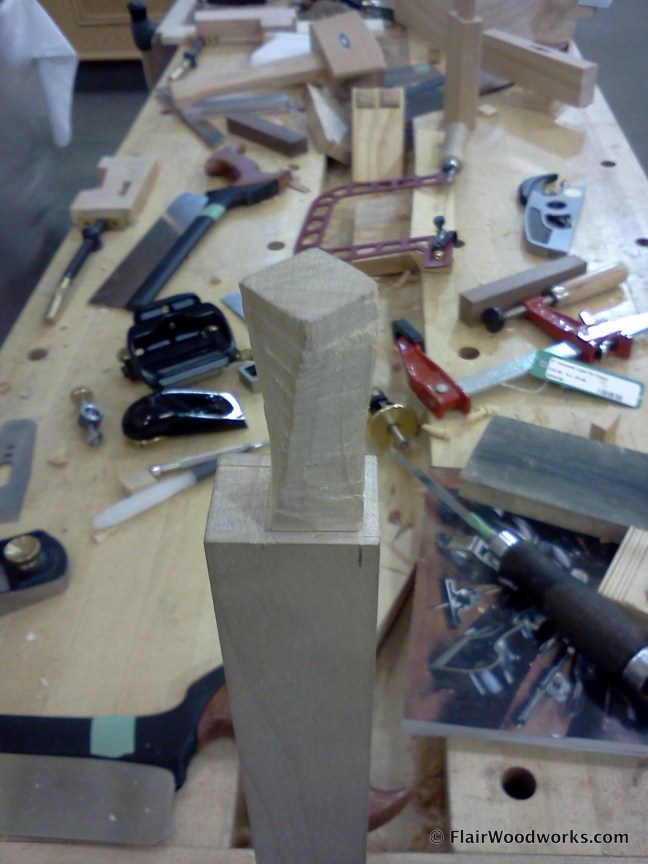
WISH! was fun, challenging and different, but it still seemed too ordinary and not mind-boggling enough to satisfy me. So my next joint was a twisted mortise and tenon. I’ve had lots of practice making twisted legs so I decided to start by making the tenon, rather than the mortise as is more conventional.
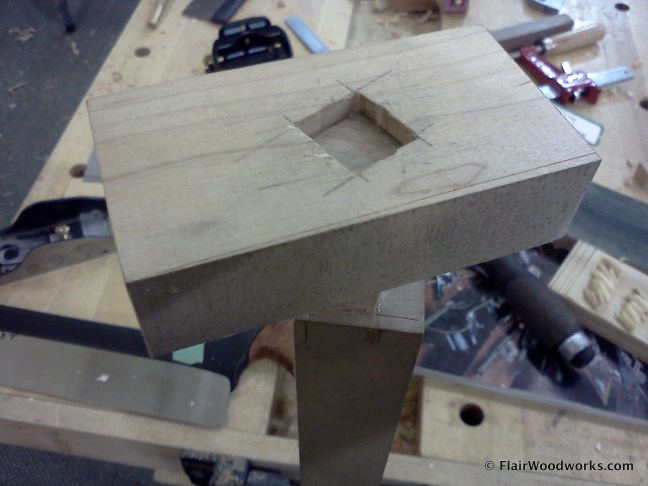
I then laid out the twisted mortise and cut it out with a fret saw.

I adjusted the mortise with a narrow chisel, then scraped the tenon until it began to fit.
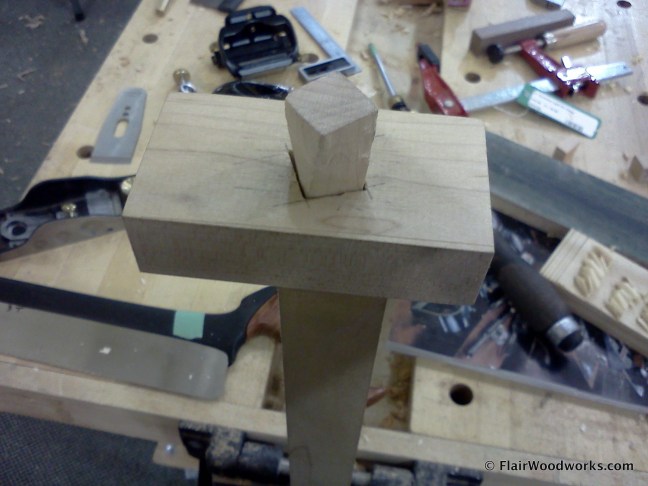
Once I got it started, it wasn’t long before I got the joint fully seated. It’s a neat joint to handle.
 Out of ideas for crazy joinery, I turned to the books for a challenge and chose the intimidating full-blind dovetail. This was my first attempt cutting it and it did not seem very difficult. Layout, however, is fairly complicated and I mis-marked and made one mis-cut on the right piece – I removed material from the face of the pins, rather than the end of the pins.
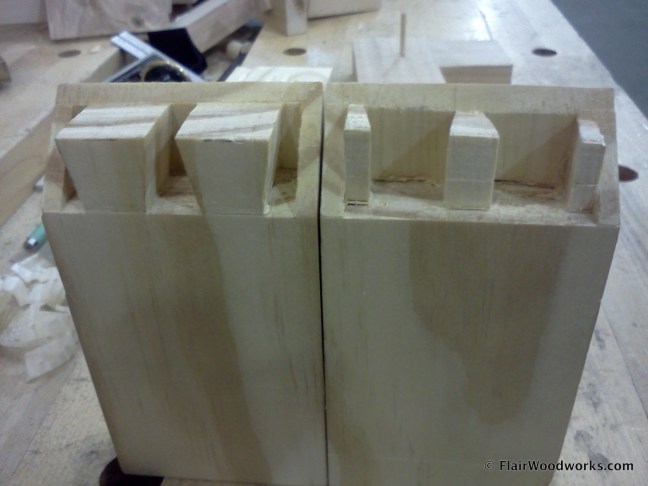
One of the blessings, I realized, is that because it’s completely blind, you don’t see my miscut. There is still lots of surface area in the joint so the strength is not compromised.

The fit is good and the joint closes with moderate pressure.

Lastly, I cut a finger joint using a Veritas dovetail saw. Since the spacing is done by eye and each finger is equal to the kerf of the saw, no chisel work is required so it is a quick joint to cut, despite the fineness.

It was a fun way to spend a few days and a good opportunity to practice my skills with hand tools and try some new joinery. I haven’t yet figured out where I can use the twisted tenon, but I’ll keep thinking.
Discover more from Products From The Mind of Chris Wong
Subscribe to get the latest posts sent to your email.

Chris – As usual I am amazed! The intricacies all of these joinery techniques are astonishing. Bravo!!!
Excellent post Chris, & of course the work you’re showing. Great experimentation & well done showing & explaining your challenges. You never know until you try. I hope more people are enthused by your skills
I absolutely love your work!! :) Thanks for sharing!!
Chris,
It sounds like a lot of fun for one weekend.
I am sure they were impressed.
Steve
Nice! I love the rounded dovetails. By the way, were you paid by Lee Valley? (just kidding)
Best,
Serge
Amazing! :) I really would need a course about joinery…
The twisted tenon is great. I could see it being cut so that the EXIT is square to the stock, so it looks like a common through tenon. Would add a bit of mystery to the finished product. This would require that the tenon is not square to the piece at the shoulder.
Another way to make that work would be to make the tenon rotate a full 90 degrees.
Chris
The key would be leaving enough sticking out that the twist is clear for the inevitable “How’d he do that?”. Maybe I’ll try this. Way out of my comfort zone, so why not? Maybe with a tusk for added subtlty