

On the morning of Sunday, April 15th, Morton and I exchanged ideas about trestle tables, spurred on by a recent sketch of a table on which he was working. That got me yearning to build a trestle table.
I documented my progress live on Twitter which was useful because each update had a time stamp so followers could see the rate at which I progressed. Here is a list of the previous Sessions:
Session 1 – Flat Boards are Boring;
Session 2 – Playing with Slabs;
Session 3 – From Two Slabs to One Table Top;
Session 4 – Clamping Odd Shapes and Sketching on Wood;
Session 5 – Routing Pockets for Battens;
Session 6 – Making Battens and Installing Countertop Connectors;
Session 7 – Installing Battens and Flattening the Underside;
Session 8 – Make Your Tools Work for You and Flattening the Top;
Session 9 – Mortises the Slow Way (or Why I’m Buying a Domino XL);
Session 10 – Curvy Legs are Always Good;
Session 11 – Straight Lines on Wonky Surfaces;
Session 12 – Fitting the Mother of all Mortise & Tenon Joints;
Session 13 – Making Things Better, Worse, then Better;
Session 14 – Battens and Complicated Tenons, Again;
Session 15 – The Trestle Comes Together Session;
Session 16 – Angled Mortises and Tenons;
Session 17 – Two Feet for Two Legs; and
Session 18 – Attachment Strips and Power Carving.
(If you are not familiar with the format used on Twitter, every update, or “tweet” below starts with a username, being the author of that tweet. Sometimes, you see two or more usernames in a tweet. The second (and third, etc) usernames are preceded by a @ symbol and are people to whom the author is talking. The other symbol you see is #, which serves as a category. I try to remember to categorize all my tweets pertaining to this project under #flairww.)

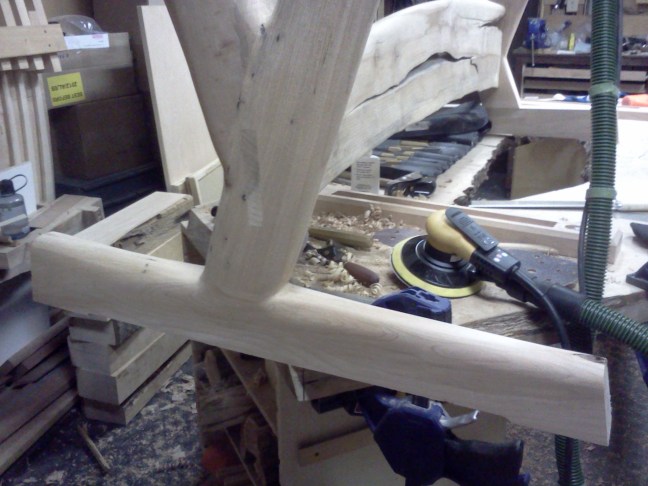
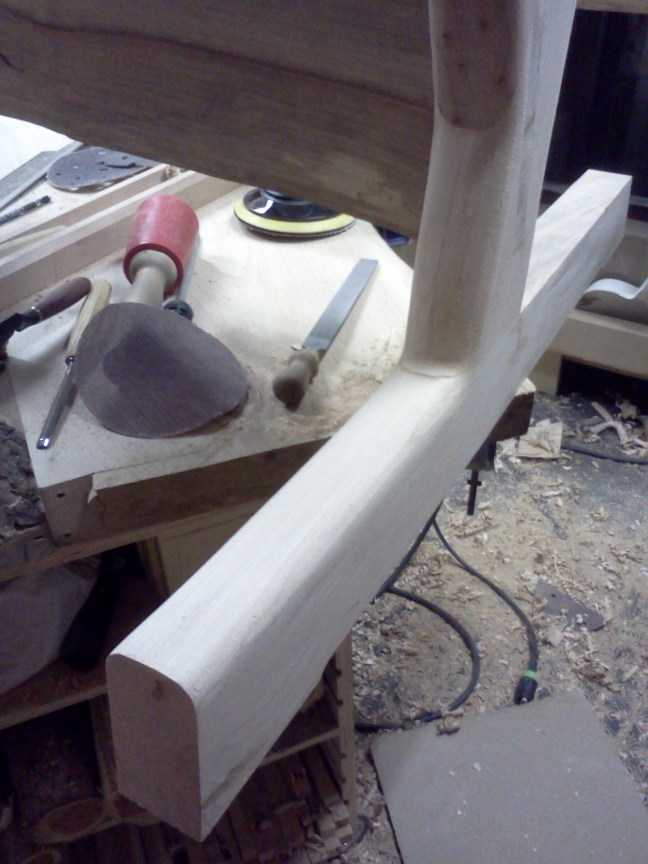
FlairWoodworks There will be much sanding today. #flairww -11:56 AM May 19th, 2012
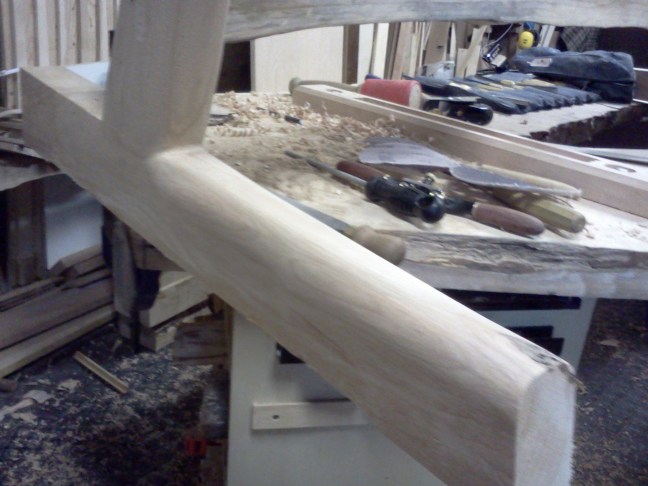
FlairWoodworks I am happy with how this section of the leg looks. #flairww -12:02 PM May 19th, 2012

FlairWoodworks I think I will cut the tenons flush after all. #flairww -12:05 PM May 19th, 2012

FlairWoodworks I cut the tenon off and I’m using my block plane to trim it flush. #flairww -12:18 PM May 19th, 2012
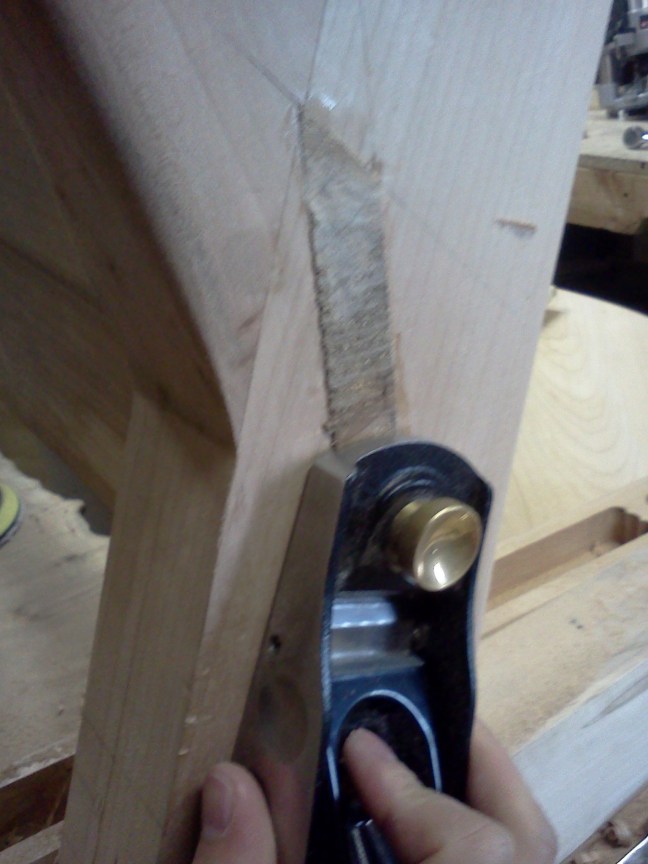
FlairWoodworks I haven’t sharpened my block plane through this whole project. I can’t believe it’s still sharp. #flairww -12:20 PM May 19th, 2012
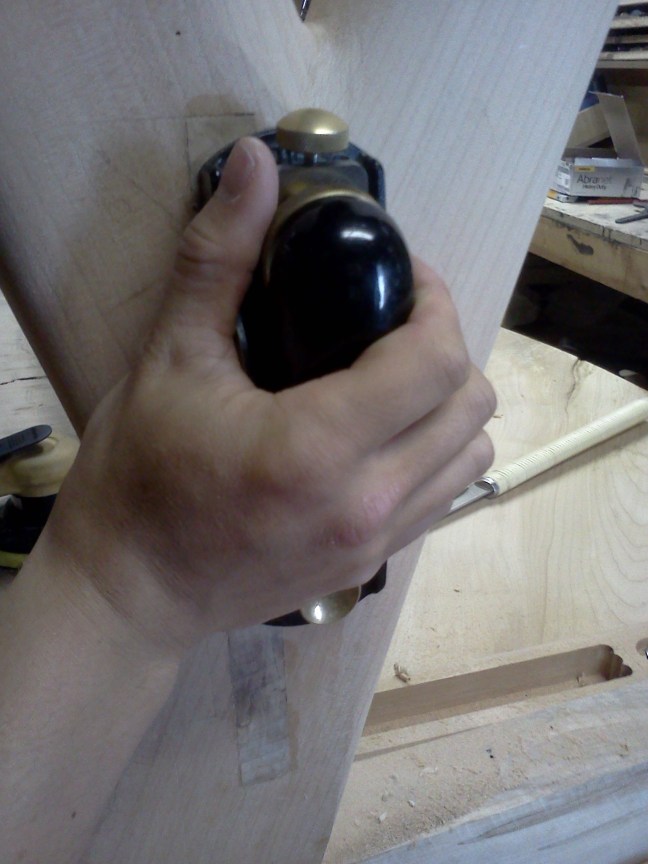
FlairWoodworks The block plane affords many different grips. #flairww -12:24 PM May 19th, 2012
FlairWoodworks When sanding, my objective is to remove all other existing tool marks. #flairww -12:27 PM May 19th, 2012

FlairWoodworks When shaping, I work the entire piece as one – I don’t let one section get further ahead than another. #flairww -12:29 PM May 19th, 2012
FlairWoodworks I will often make changes to the shape so I only move onto finer grits of sandpaper once I’ve established a shape I like. #flairww -12:30 PM May 19th, 2012
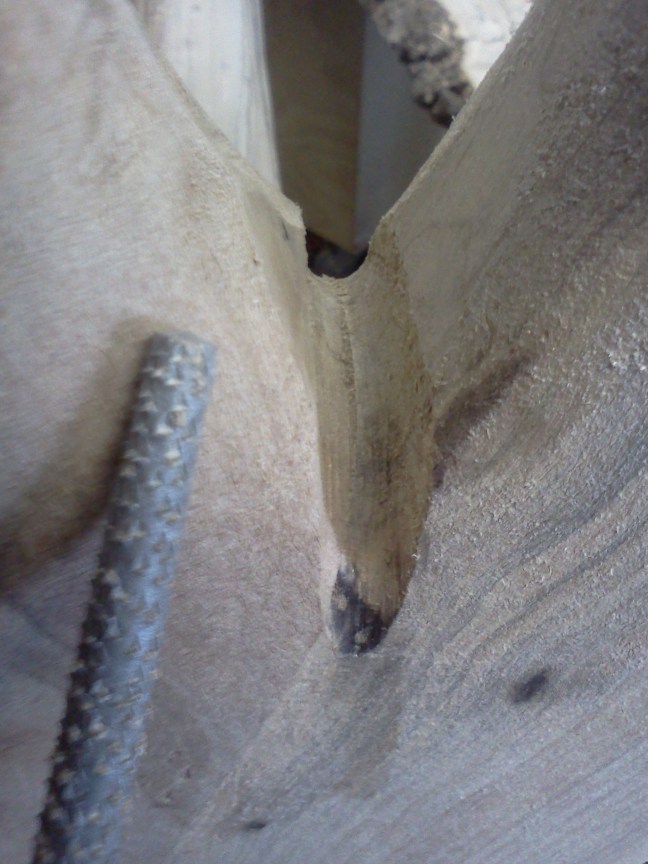
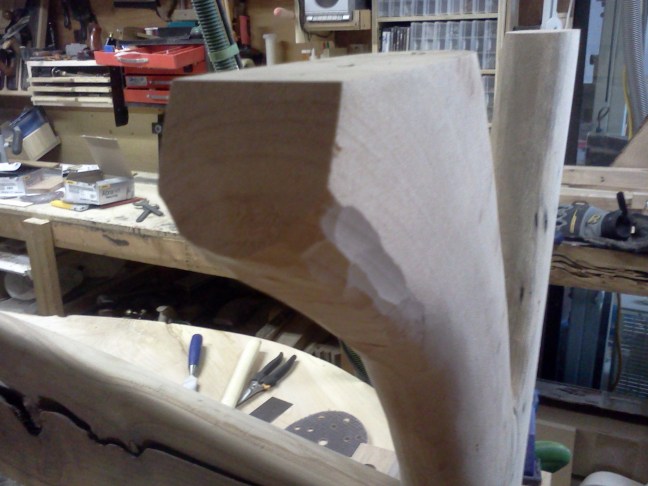
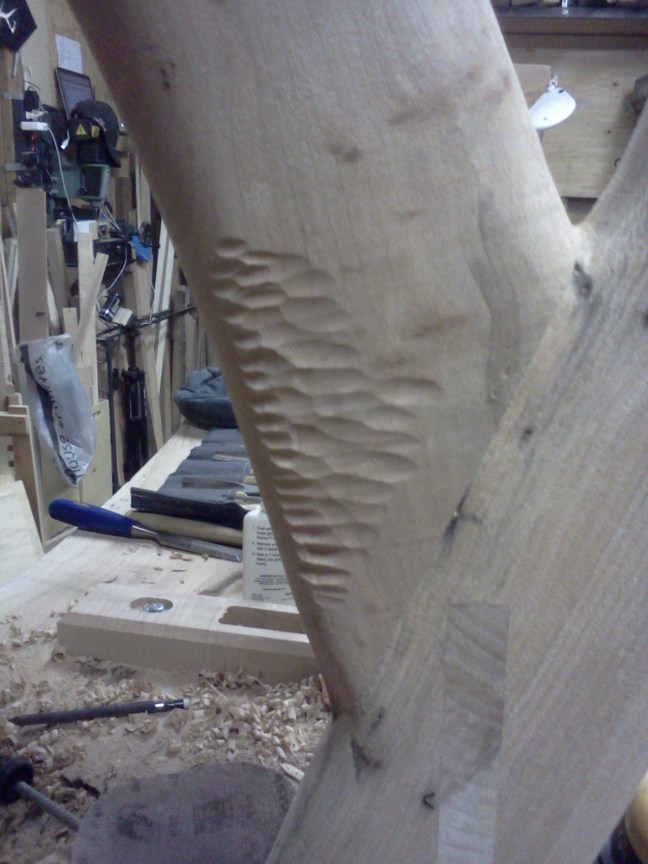
FlairWoodworks This area was too difficult to carve with the angle grinder. I’ll use gouges, rasps and sandpaper. #flairww -12:36 PM May 19th, 2012
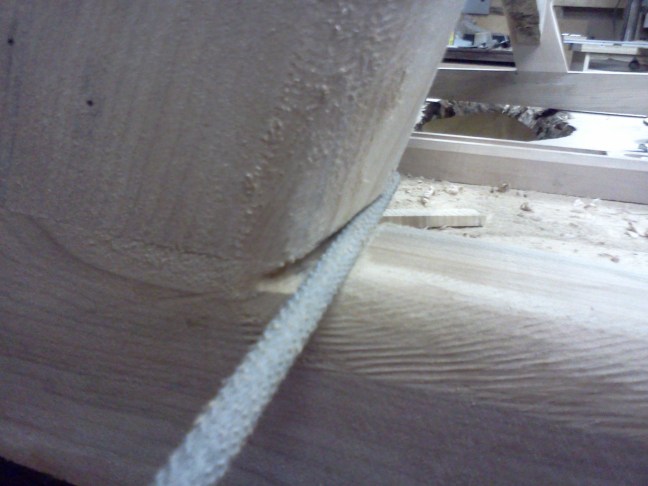
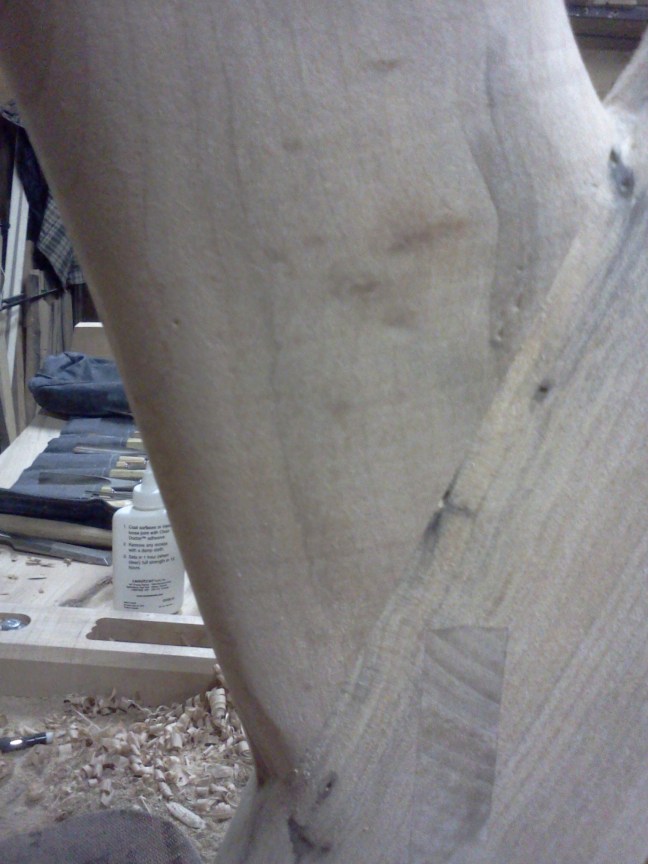
FlairWoodworks It can be difficult to remove marks and glue in corners. I use a card scraper at a low angle. #flairww -12:43 PM May 19th, 2012

LornaBourke @FlairWoodworks Good call on trimming the tenon to be flush with leg, looks very nice. -12:45 PM May 19th, 2012
FlairWoodworks Thank you! #flairww RT @LornaBourke: @FlairWoodworks Good call on trimming the tenon to be flush with leg, looks very nice. -12:46 PM May 19th, 2012
FlairWoodworks Since I’m still in the initial refining stage, I am using coarse sandpaper and will sand in all ways regardless of grain direction. #flairww -12:50 PM May 19th, 2012
FlairWoodworks This section is now shaped. It still needs to be refined. #flairww -1:00 PM May 19th, 2012
FlairWoodworks This surface is far from smooth but I am happy with the shape. I’ll move on to the other leg. #flairww -1:14 PM May 19th, 2012
FlairWoodworks This leg needs a lot of refining! #flairww -1:20 PM May 19th, 2012

FlairWoodworks 40-grit makes quick work of the uneven surface. #flairww -1:23 PM May 19th, 2012

FlairWoodworks I’m still using the first 40-grit Abranet HD sanding disc. It’s not worn out, but I’ll change it for a fresh one. #flairww -1:25 PM May 19th, 2012
FlairWoodworks Preliminary sanding with my sander is done. Now I’ll use hand tools to sculpt the tighter areas. #flairww -1:50 PM May 19th, 2012

FlairWoodworks I use a coarse, round rasp to carve until the point of the V disappears. I’m almost there. #flairww -1:55 PM May 19th, 2012
FlairWoodworks Then I use both sides of a half-round rasp to blend the surfaces. #flairww -1:59 PM May 19th, 2012
FlairWoodworks By the way, I neither own, nor have any desire to own any fine rasps. Mine are all very coarse and cost about $20-30 each. #flairww -2:05 PM May 19th, 2012
sharpendwood @FlairWoodworks Really like the shaping you’ve done. Very pleasing lines…at least to me ;) -2:19 PM May 19th, 2012
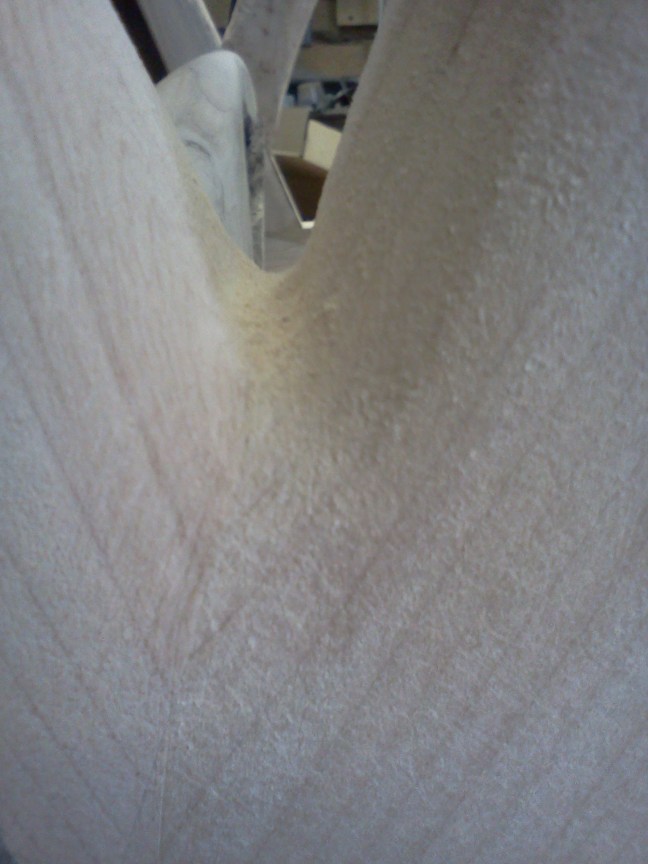
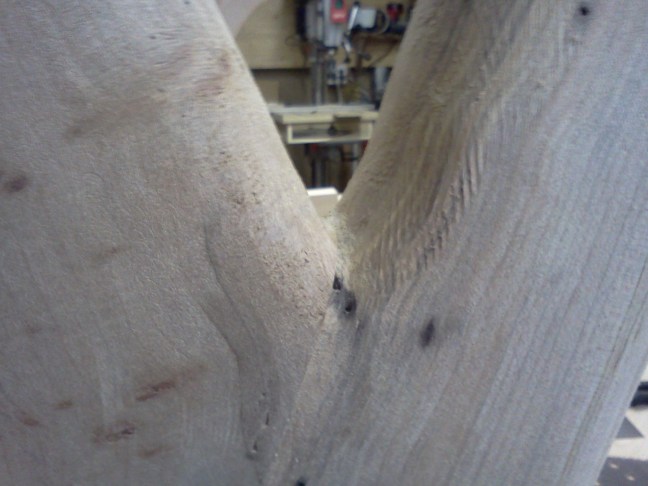
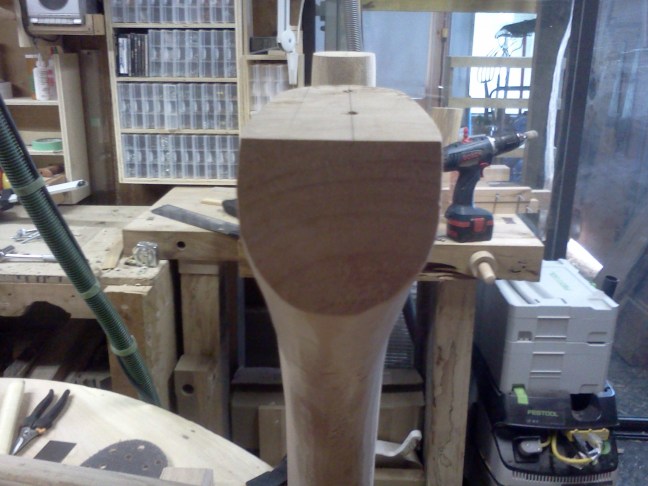
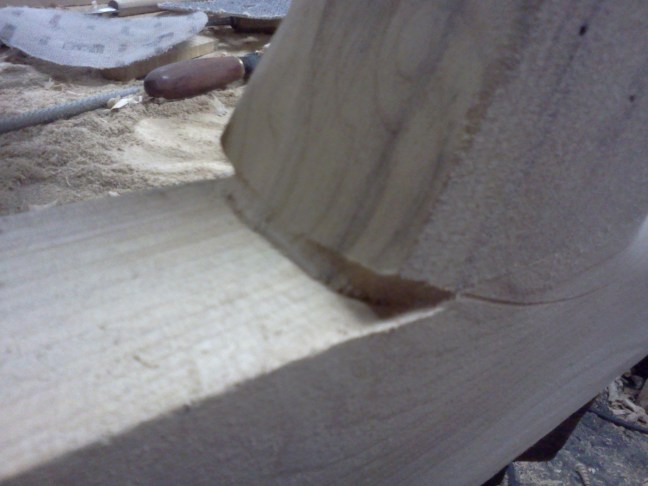
FlairWoodworks When I power-carved the legs, I left this area square. I want to sculpt it to be more round. #flairww -2:28 PM May 19th, 2012
FlairWoodworks Oh, here is the crotch area completed. #flairww -2:29 PM May 19th, 2012
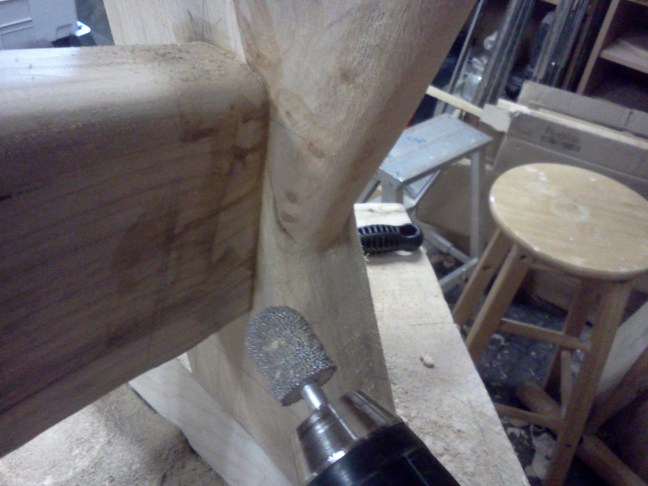
FlairWoodworks I used a Kutzall burr in my drill to sculpt this tight area. #flairww -2:42 PM May 19th, 2012
FlairWoodworks The end of this leg is much larger than on the other leg. I’m trying to decide if I should change it. #flairww -2:45 PM May 19th, 2012
FlairWoodworks Any guesses as to what I decided to do? #flairww -2:47 PM May 19th, 2012
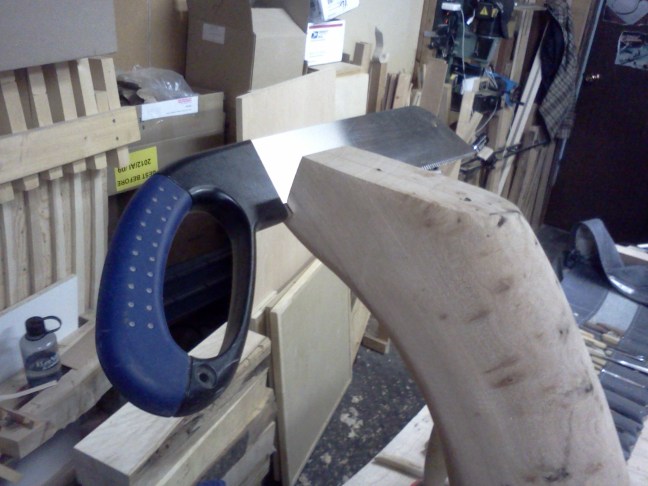
FlairWoodworks After cutting the bulk of the waste away, I used a gouge to roughly establish the shape. #flairww -2:58 PM May 19th, 2012
FlairWoodworks I used a flat spokeshave to refine the shape. No templates or measurements were used. #flairww -3:04 PM May 19th, 2012
roncbailey @FlairWoodworks really have enjoyed following this build. It looks outstanding! -3:22 PM May 19th, 2012
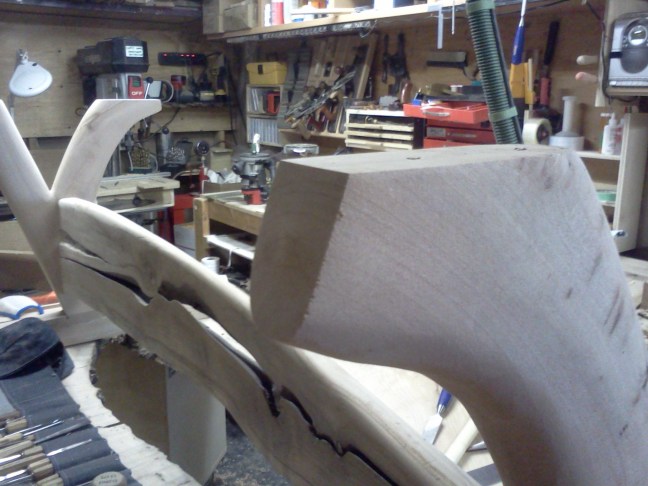
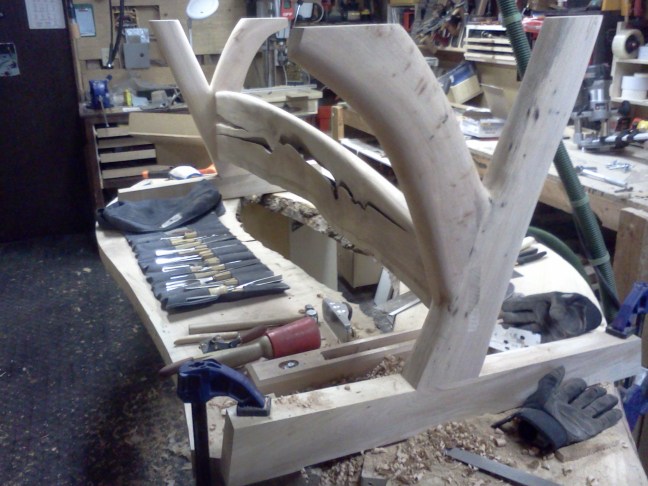
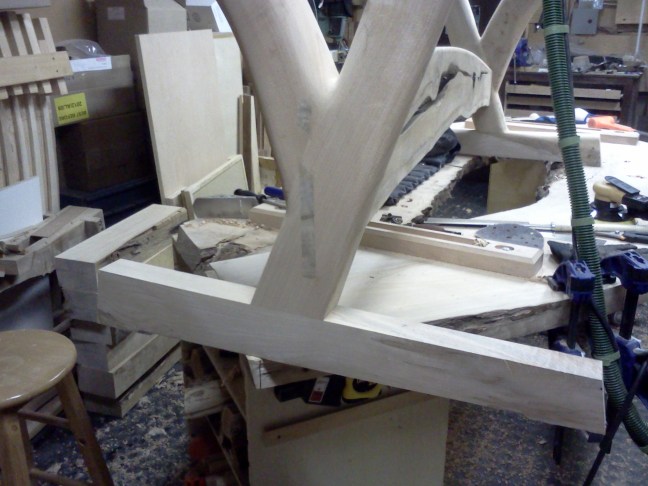
FlairWoodworks Both legs are sculpted. Before progressing to finer grits I need to decide if I want to do any more shaping. #flairww -3:21 PM May 19th, 2012
FlairWoodworks Thank you, Ron! #flairww RT @roncbailey: @FlairWoodworks really have enjoyed following this build. It looks outstanding! -3:22 PM May 19th, 2012
FlairWoodworks I don’t like the square edges on the tops of the feet. #flairww -3:53 PM May 19th, 2012

TheWoodBug @FlairWoodworks Now your talking! -3:54 PM May 19th, 2012
FlairWoodworks Whooo! #flairww RT @TheWoodBug: @FlairWoodworks Now your talking! -3:54 PM May 19th, 2012
tulcarvely: @FlairWoodworks what are you thinking of doing? Maybe angle bevel? or rounded? -3:57 PM May 19th, 2012
FlairWoodworks Probably rounded. #flairww RT @tulcarvely: @FlairWoodworks what are you thinking of doing? Maybe angle bevel? or rounded? -3:57 PM May 19th, 2012
TheWoodBug @FlairWoodworks having fun today I can see and making great progress sir -3:58 PM May 19th, 2012
FlairWoodworks @TheWoodBug It is very fulfilling to see it take shape. #flairww -3:59 PM May 19th, 2012
FlairWoodworks I’m not sure how much I want to round over the ends. I’ll start with the area nearest the legs, then work outwards. #flairww -4:01 PM May 19th, 2012
FlairWoodworks Having the right tools to do this type of work is important but trusting yourself is even more important. #flairww -4:04 PM May 19th, 2012
DyamiPlotke: @FlairWoodworks looks great. -4:13 PM May 19th, 2012
FlairWoodworks Thanks, Dyami! #flairww RT @DyamiPlotke: @FlairWoodworks looks great. -4:14 PM May 19th, 2012
FlairWoodworks Have I inspired anybody to try sculpting part of their next piece of furniture? #flairww -4:15 PM May 19th, 2012
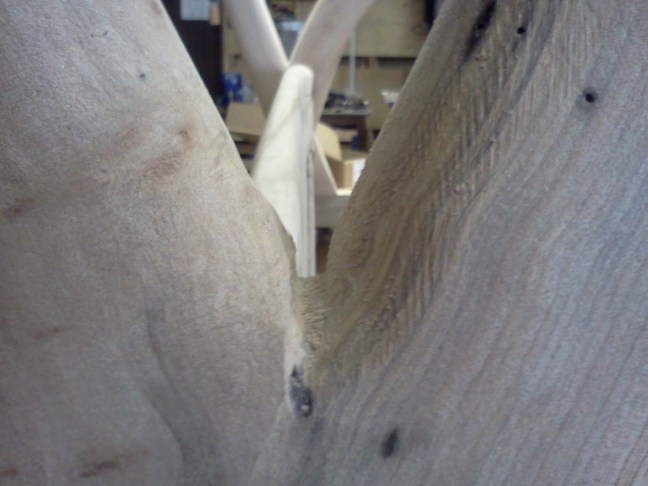
FlairWoodworks This angular corner doesn’t look good to me either. #flairww -4:25 PM May 19th, 2012

FlairWoodworks The near-right side is rounded. I can’t stop here. #flairww -4:25 PM May 19th, 2012
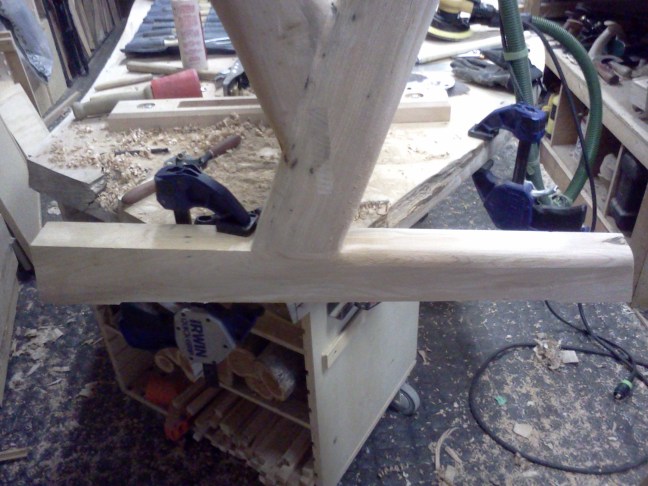
FlairWoodworks Again, I used my round rasp to round the V. #flairww -4:31 PM May 19th, 2012
FlairWoodworks Some people like to undercut their tenon shoulders. It’s not a good idea if you will be sculpting the piece. #flairww -4:31 PM May 19th, 2012
gvmcmillan @FlairWoodworksThat joint sure looks nice tho! -4:33 PM May 19th, 2012
FlairWoodworks Thanks, Grant! #flairww RT @gvmcmillan: @FlairWoodworksThat joint sure looks nice tho! -4:34 PM May 19th, 2012
BCcraftmaster @FlairWoodworks that’s a great point [to not undercut tenon shoulders]. Never really thought about that but will have to keep it in mind if I decide to go “round” #flairww-4:36 PM May 19th, 2012
FlairWoodworks I’m happy with the shape of this area and will do the same on the other end of this foot, then the other foot. #flairww 5:04 PM May 19th, 2012
FlairWoodworks At 5:04, I’m going for a lunch break. #flairww -5:04 PM May 19th, 2012
FlairWoodworks I’m very happy with the progress I’ve made so far today. #flairww -5:05 PM May 19th, 2012
SMeekWoodworks @FlairWoodworks Really can’t wait to see this table when it’s finished. It’s amazing. -5:47 PM May 19th, 2012
FlairWoodworks Wow! That was the most amazing sandwich I’ve had in a long time! Toasted sourdough, guacamole… (back in the shop now). #flairww -8:04 PM May 19th, 2012
FlairWoodworks I’m going to start shaping the left side of this foot. #flairww-8:09 PM May 19th, 2012

FlairWoodworks As always, I started by defining the ankle. #flairww -8:12 PM May 19th, 2012
FlairWoodworks I’ve rounded the leg. Now I’ll work on the foot. #flairww -8:22 PM May 19th, 2012
JC_McGrath @FlairWoodworks add me to the list, this looks great Chris, can’t wait to it done. Inspiring -8:30 PM May 19th, 2012
FlairWoodworks Awesome! Thanks, Jon! #flairww RT @JC_McGrath: @FlairWoodworks add me to the list, this looks great Chris, can’t wait to it done. Inspiring -8:31 PM May 19th, 2012
FlairWoodworks I’ve rounded over the top of the foot as well as the transition into the leg. #flairww -9:10 PM May 19th, 2012
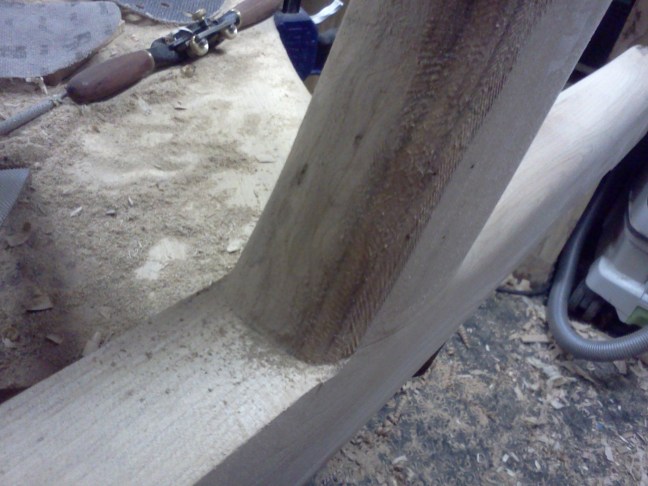
FlairWoodworks I’m happy with the foot for now, but I think the central section is too flat. #flairww -9:12 PM May 19th, 2012
FlairWoodworks One way to quickly (and tidily and quietly) add shape is to carve across the grain with a deep gouge. #flairww -9:18 PM May 19th, 2012
FlairWoodworks My random orbit sander and 40-grit paper quickly evened out the surface. #flairww -9:21 PM May 19th, 2012
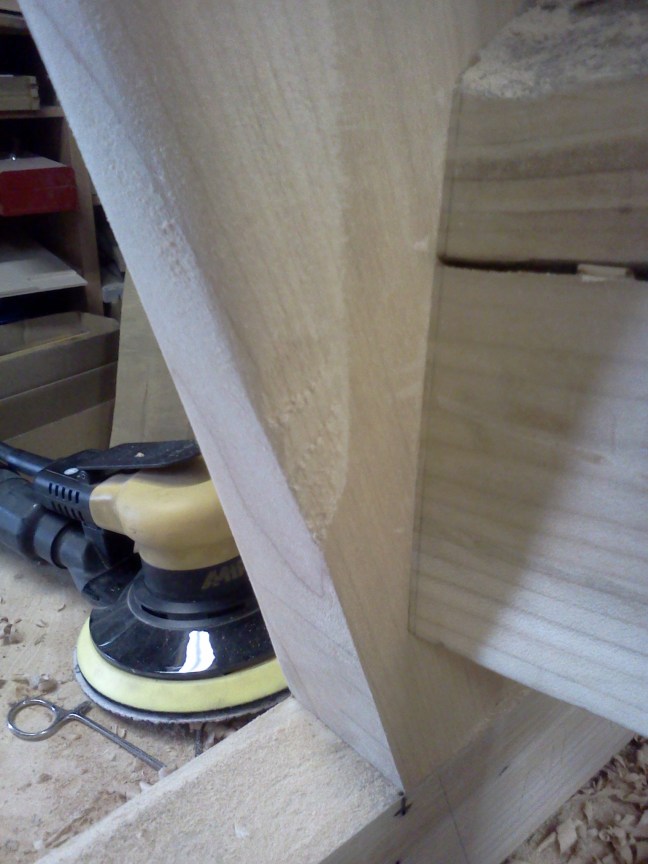
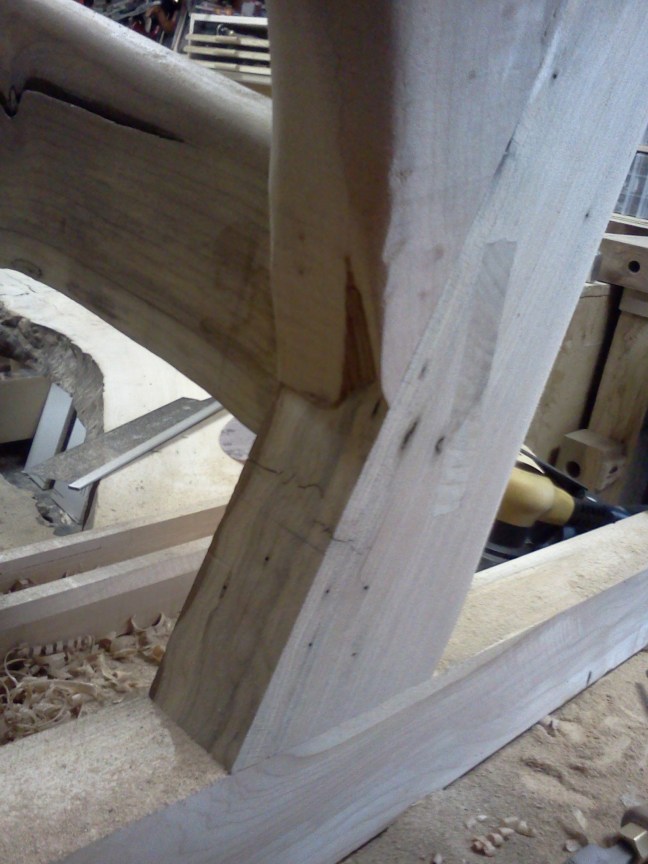
FlairWoodworks At the bottom of the last picture, you can see a section that needs to be faired, right at the base of the intersection. #flairww -9:21 PM May 19th, 2012
FlairWoodworks The centre section is a little more rounded now. #flairww -9:44 PM May 19th, 2012

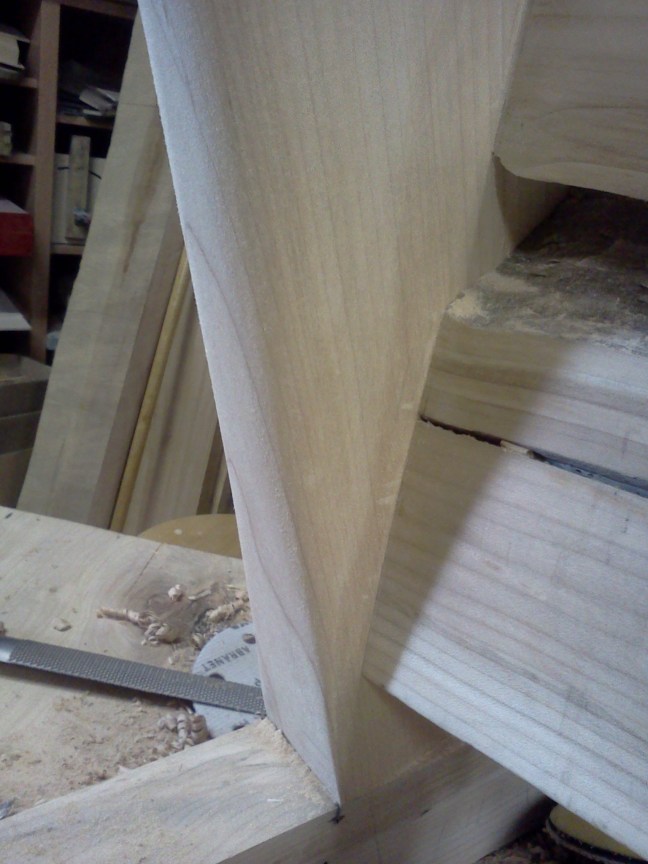
FlairWoodworks Here’s another picture of this end of the base. #flairww -9:50 PM May 19th, 2012

FlairWoodworks I turned the base around. This side does not look nearly as good without the extra sculpting. #flairww -9:55 PM May 19th, 2012
FlairWoodworks I’ve got one side of the foot shaped. #flairww -11:04 PM May 19th, 2012
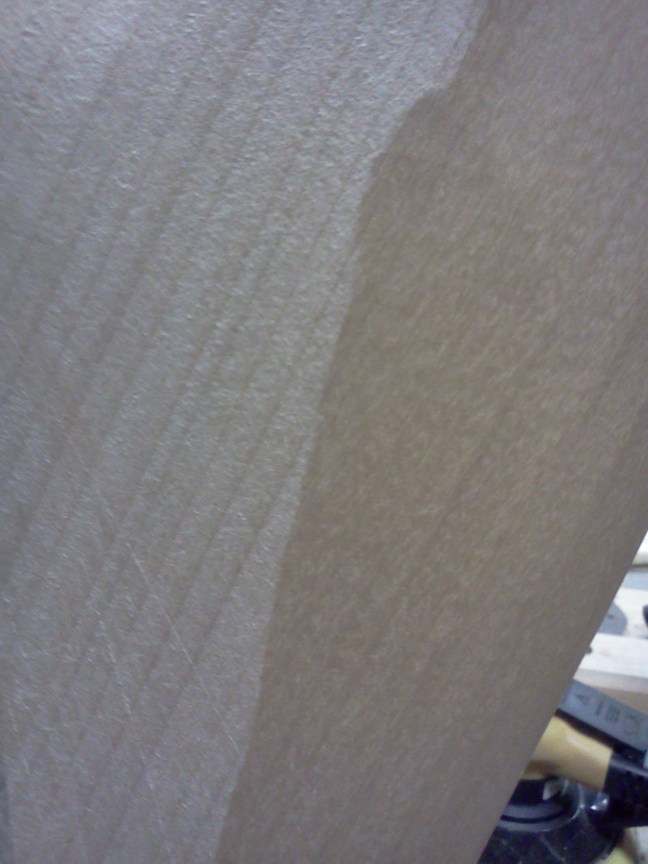
FlairWoodworks I thought this was a neat picture. The left was sanded with 40-grit, the right side from a spokeshave. #flairww -11:07 PM May 19th, 2012
FlairWoodworks The shaping is done… next comes a lot of sanding to polish the surfaces. #flairww -11:31 PM May 19th, 2012

FlairWoodworks I’m done work in the shop for the day. #flairww -11:31 PM May 19th, 2012
Next time in the shop, there will be a lot of sanding! Bring your dust mask! Click here to leave a comment.
Discover more from Products From The Mind of Chris Wong
Subscribe to get the latest posts sent to your email.

To answer your question (late), you’re likely the inspiration for the sculpting on my last project. Demilune next :)
Paul-Marcel,
Wahoo! I can’t wait to see what it looks like!
Chris