

On the morning of Sunday, April 15th, Morton and I exchanged ideas about trestle tables, spurred on by a recent sketch of a table on which he was working. That got me yearning to build a trestle table.
I documented my progress live on Twitter which was useful because each update had a time stamp so followers could see the rate at which I progressed. Here is a list of the previous Sessions:
Session 1 – Flat Boards are Boring;
Session 2 – Playing with Slabs;
Session 3 – From Two Slabs to One Table Top;
Session 4 – Clamping Odd Shapes and Sketching on Wood;
Session 5 – Routing Pockets for Battens;
Session 6 – Making Battens and Installing Countertop Connectors;
Session 7 – Installing Battens and Flattening the Underside;
Session 8 – Make Your Tools Work for You and Flattening the Top;
Session 9 – Mortises the Slow Way (or Why I’m Buying a Domino XL);
Session 10 – Curvy Legs are Always Good;
Session 11 – Straight Lines on Wonky Surfaces;
Session 12 – Fitting the Mother of all Mortise & Tenon Joints;
Session 13 – Making Things Better, Worse, then Better;
Session 14 – Battens and Complicated Tenons, Again;
Session 15 – The Trestle Comes Together Session;
Session 16 – Angled Mortises and Tenons; and
Session 17 – Two Feet for Two Legs.
(If you are not familiar with the format used on Twitter, every update, or “tweet” below starts with a username, being the author of that tweet. Sometimes, you see two or more usernames in a tweet. The second (and third, etc) usernames are preceded by a @ symbol and are people to whom the author is talking. The other symbol you see is #, which serves as a category. I try to remember to categorize all my tweets pertaining to this project under #flairww.)

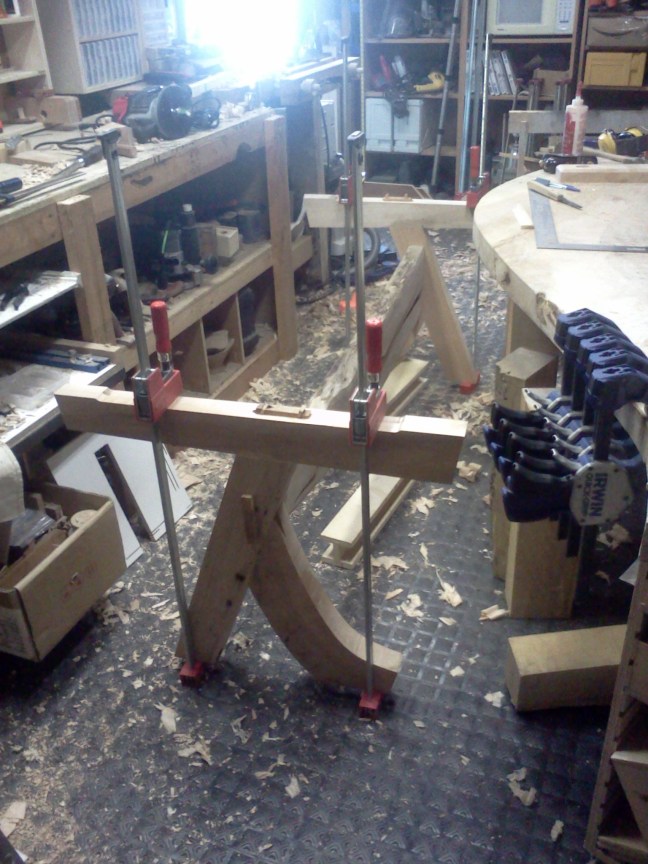
FlairWoodworks And… into the shop I go! First thing I do: turn on the lights; then remove the clamps! #flairww -1:33 PM May 17th, 2012
FlairWoodworks I’ll cut the tenons flush. #flairww -1:38 PM May 17th, 2012

FlairWoodworks Because I want to do other things today, I’m not using my small, fine-toothed flush-cut saw. #flairww -1:41 PM May 17th, 2012

FlairWoodworks I then used a block plane to set the tenon flush. #flairww -1:43 PM May 17th, 2012

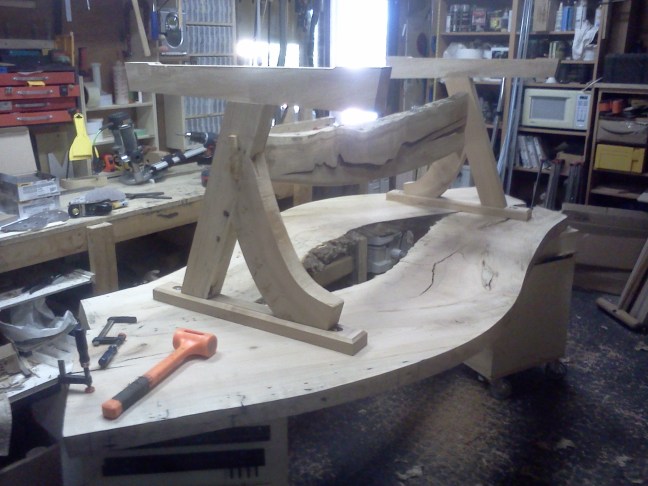
FlairWoodworks The base is assembled. It still needs to be sculpted. #flairww -1:50 PM May 17th, 2012

FlairWoodworks I cut two attachment strips which will be fastened to the legs and mortised into the battens. #flairww -2:11 PM May 17th, 2012

FlairWoodworks The purpose of these strips is to secure the base to the top and conceal the centre two bolt holes. #flairww -2:12 PM May 17th, 2012
FlairWoodworks In the finished table, only the two outermost bolts will be used. #flairww -2:12 PM May 17th, 2012
FlairWoodworks It took some careful layout to position the battens. Next, I’ll fasten them with screws. #flairww -2:39 PM May 17th, 2012

FlairWoodworks I used a 17/64″ transfer punch to mark the location of the 9/32″ clearance holes. #flairww -2:59 PM May 17th, 2012

FlairWoodworks The smaller punch is easier to use because there is no friction between it and the hole. #flairww -2:59 PM May 17th, 2012
FlairWoodworks The mark could be out by 1/128″ but I don’t care. #flairww -3:00 PM May 17th, 2012
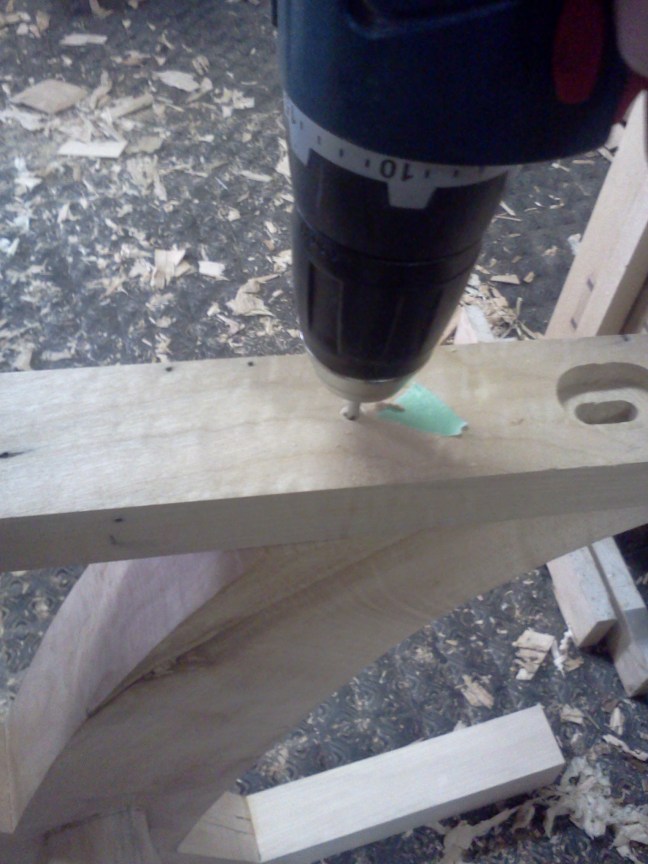
FlairWoodworks To guide the drill bit, I used my drill press to drill through a block of scrap wood. #flairww -3:08 PM May 17th, 2012
FlairWoodworks E-mails are coming in non-stop today. #flairww -3:10 PM May 17th, 2012
FlairWoodworks One attachment strip is mounted. #flairww -3:12 PM May 17th, 2012

FlairWoodworks I use my cordless drill/driver to install the screws most of the way but always finish by hand. #flairww -3:17 PM May 17th, 2012

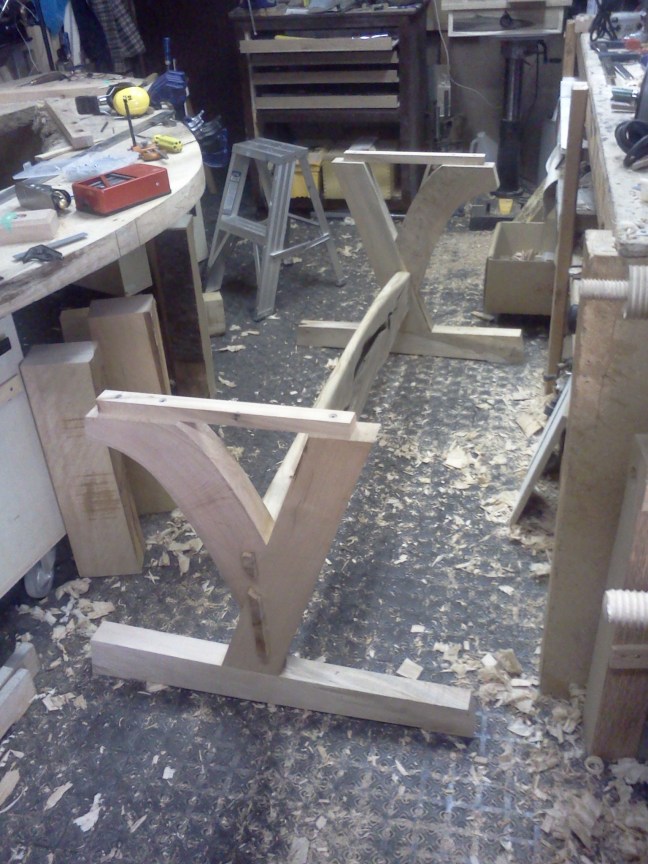
FlairWoodworks Here’s a picture of the base for you to look at while I tidy up my shop a little. #flairww -3:19 PM May 17th, 2012
CashFromCraft @FlairWoodworks I find setting the cluch to be helpful when driving a number in the same operation. -3:22 PM May 17th, 2012
FlairWoodworks @CashFromCraft The drill’s clutch can be helpful, but I don’t find it accurate enough due to density variances. #flairww -3:24 PM May 17th, 2012
FlairWoodworks @CashFromCraft I have a much greater sensitivity when using a screwdriver than a power tool. #flairww -3:25 PM May 17th, 2012
DyamiPlotke @FlairWoodworks why not adjust the torque setting on the screw gun? -3:31 PM May 17th, 2012
FlairWoodworks A screwdriver allows greater sensitivity. RT @DyamiPlotke: @FlairWoodworks why not adjust the torque setting on the screw gun? -3:31 PM May 17th, 2012
FlairWoodworks Next, I’ll trace the position of the attachment strips onto the battens. #flairww -3:41 PM May 17th, 2012

FlairWoodworks I’ll remove the two centre bolts which are no longer needed and rout the pocket for the attachment strip. #flairww -3:46 PM May 17th, 2012

FlairWoodworks Ready to rout! #flairww -3:57 PM May 17th, 2012

FlairWoodworks My router fence slipped and caused this gouge. I’ll have to patch it. #flairww -4:21 PM May 17th, 2012
FlairWoodworks To fix the gouge, I first routed a straight-edged pocket. #flairww -4:31 PM May 17th, 2012

FlairWoodworks I turned the head of my marking gauge around to scribe a straight line. #flairww -4:33 PM May 17th, 2012

FlairWoodworks I cut a patch and scribed it onto the batten. #flairww -4:45 PM May 17th, 2012

FlairWoodworks I fit and glued the patch in place. After the glue dries, I’ll trim it flush. #flairww -4:59 PM May 17th, 2012

FlairWoodworks I need to finish the patch before starting the sculpting of the base. I’ll sand the underside of the table in the meantime. #flairww -5:15 PM May 17th, 2012
FlairWoodworks I simply unbolted the battens to allow uninhibited sanding of the surface. #flairww -5:26 PM May 17th, 2012

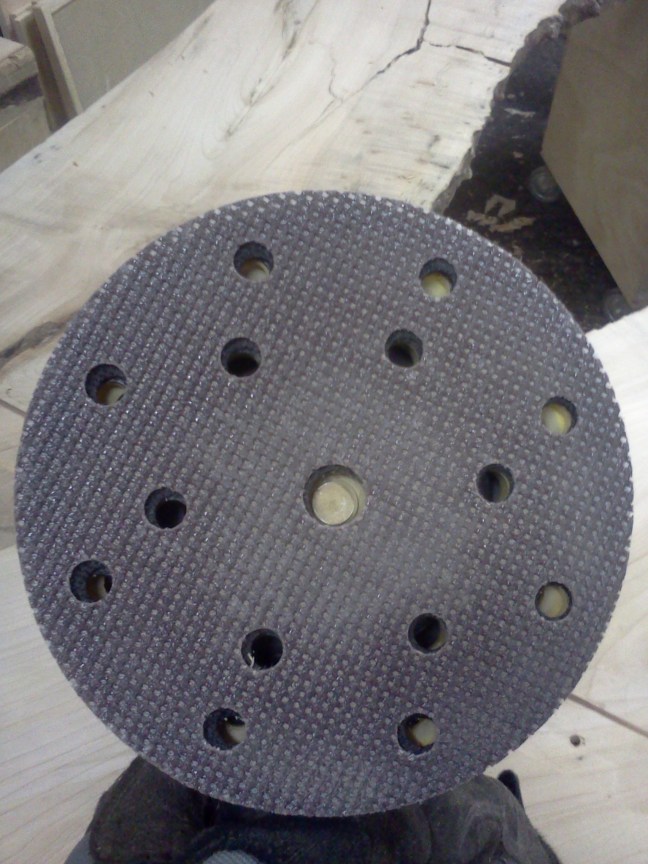
FlairWoodworks The first Abranet HD 80-grit disc lasted for almost half of the surface. The one on the bench is dull. #flairww -5:33 PM May 17th, 2012

FlairWoodworks This is the first time I’ve used the Abranet HD discs aside from testing. What’s nice about them is they’re either sharp or not. #flairww-5:42 PM May 17th, 2012
FlairWoodworks That means there is no doubt about whether the discs need to be changed. #flairww -5:42 PM May 17th, 2012
FlairWoodworks I consumed three 80-grit Abranet HD discs smoothing the bottom. #flairww -5:49 PM May 17th, 2012
DyamiPlotke @FlairWoodworks that doesn’t seem like long. Mine last multiple projects. -5:49 PM May 17th, 2012
DyamiPlotke @FlairWoodworks wait, isn’t abranet the mesh ones? That’s what I was referring to. -5:49 PM May 17th, 2012
FlairWoodworks @DyamiPlotke The regular Abranet discs are mesh and seem to last longer but don’t cut as quickly as the Abranet HD. #flairww -5:50 PM May 17th, 2012
FlairWoodworks If I only did horizontal, flat surfaces, I would have bought a Festool sander because they have less vibration. #flairww -5:52 PM May 17th, 2012
FlairWoodworks But I find the size and balance (and weight) of the Festool sanders not as conducive to sculpting, especially with one hand. #flairww -5:53 PM May 17th, 2012
FlairWoodworks The Abranet HD discs are more agressive than regular Abranet discs. From the HD 80-grit, I could go to regular 80 or regular 120. #flairww -5:54 PM May 17th, 2012
FlairWoodworks According to this twitter feed, it’s now been one hour since I glued in the patch so I’ll go back and finish the job. #flairww -6:00 PM May 17th, 2012
FlairWoodworks I used my side rabbet plane to clean up the inside edge of the patch. My #4 bench plane flushed the surface. #flairww-6:06 PM May 17th, 2012

FlairWoodworks Do you know what comes next? #flairww -6:08 PM May 17th, 2012
FlairWoodworks Yep! The attachments strips fit in the mortised battens! #flairww -6:11 PM May 17th, 2012
FlairWoodworks Sculping comes next! #flairww -6:12 PM May 17th, 2012
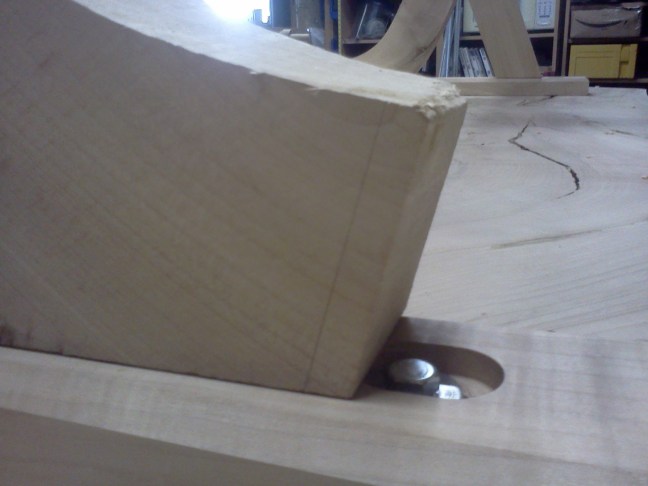
FlairWoodworks I need to trim the end of this leg so that it does not cover the bolt. #flairww -6:14 PM May 17th, 2012
FlairWoodworks Cancel plans for tonight – I’m power carving! #flairww -6:29 PM May 17th, 2012

FlairWoodworks I’m wearing a long-sleeved jacket, gloves, goggles, ear muffs, and a dust mask. #flairww -6:33 PM May 17th, 2012
MansFineFurn @FlairWoodworks tweet-along’s hidden side benefit: work timer -6:36 PM May 17th, 2012
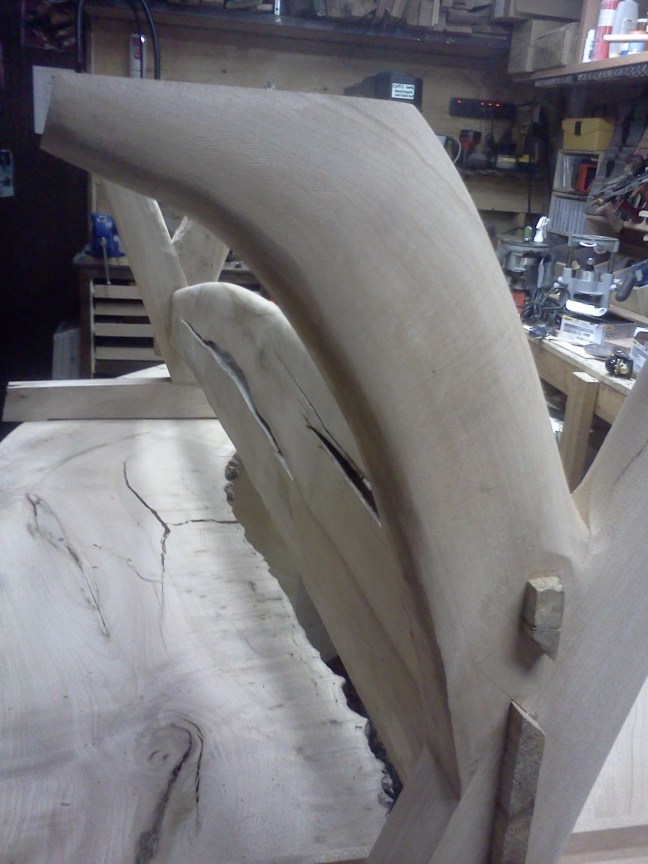
FlairWoodworks Sculpting is going well so far. #flairww -6:51 PM May 17th, 2012

FlairWoodworks The legs are rounded at the top and transition into a rectangular cross section at the bottom. #flairww -7:42 PM May 17th, 2012

FlairWoodworks I’ve finished power carving outside so I brought the base back inside where I’ll refine the shape with rasps and sandpaper. #flairww -7:57 PM May 17th, 2012
DyamiPlotke @FlairWoodworks what did you power carve it with? -8:02 PM May 17th, 2012
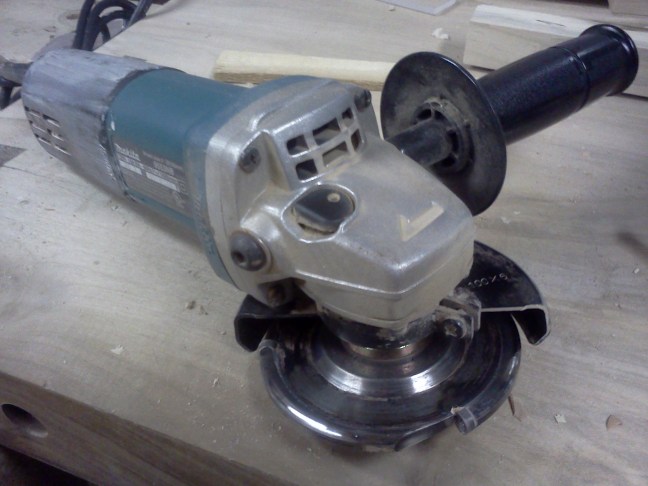
FlairWoodworks @DyamiPlotke I was just thinking that I should take a picture of my grinder and Arbortech disc. #flairww -8:05 PM May 17th, 2012
DyamiPlotke @FlairWoodworks How is it to control? Taking a grinder to wood has always intimidated me (concrete & metal I grind away on). -8:07 PM May 17th, 2012
FlairWoodworks @DyamiPlotke It is certainly easier to dig into wood and cause a catch (than with concrete or metal) but I have great control. #flairww -8:09 PM May 17th, 2012
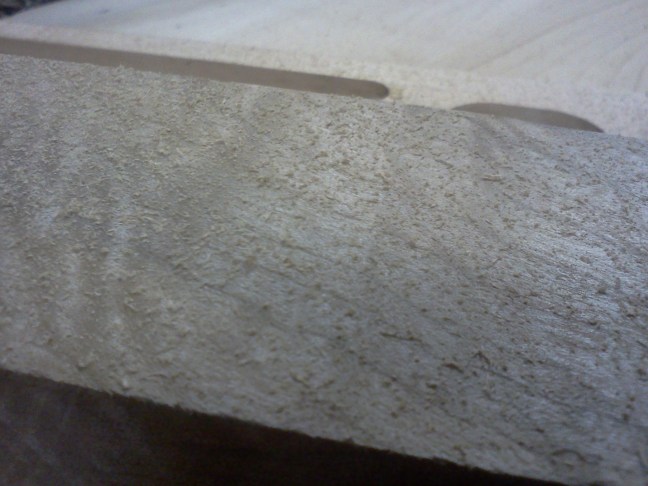
FlairWoodworks The surface left by the Arbortech disc is far from smooth. #flairww -8:12 PM May 17th, 2012

DyamiPlotke @FlairWoodworks I’ll have to pick up an arbortec blade and try it out. Can you recommend one? -8:12 PM May 17th, 2012
FlairWoodworks @DyamiPlotke Arbortech and King Arthur’s Tools are two makers of power carving wheels. #flairww -8:16 PM May 17th, 2012
FlairWoodworks @DyamiPlotke I use THIS ONE. The carbide cutters last a really long time! #flairww -8:17 PM May 17th, 2012
FlairWoodworks @DyamiPlotke If you’re serious about power carving, it’s a great way to go. It cuts in all directions. #flairww -8:18 PM May 17th, 2012
FlairWoodworks The Lancelot and Squire wheels don’t cut well on the draw stroke using the cutter’s face. The edge of the cutter does the cutting. #flairww -8:19 PM May 17th, 2012
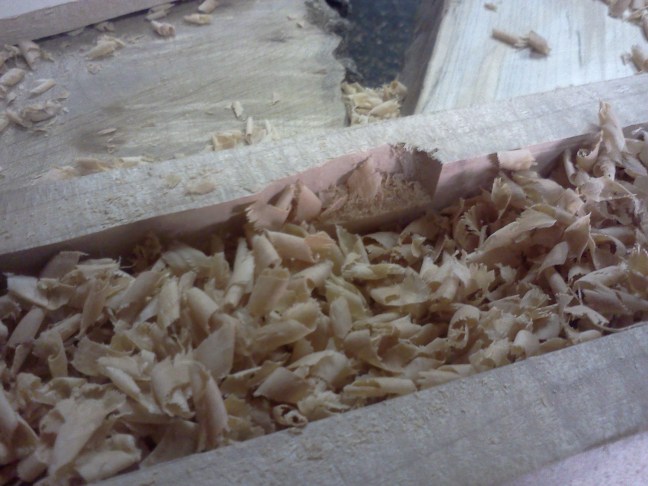
FlairWoodworks Ready to refine… with 40-grit! #flairww-8:25 PM May 17th, 2012

FlairWoodworks This sharp 40-grit paper doesn’t make dust – it makes little shavings! #flairww -8:28 PM May 17th, 2012
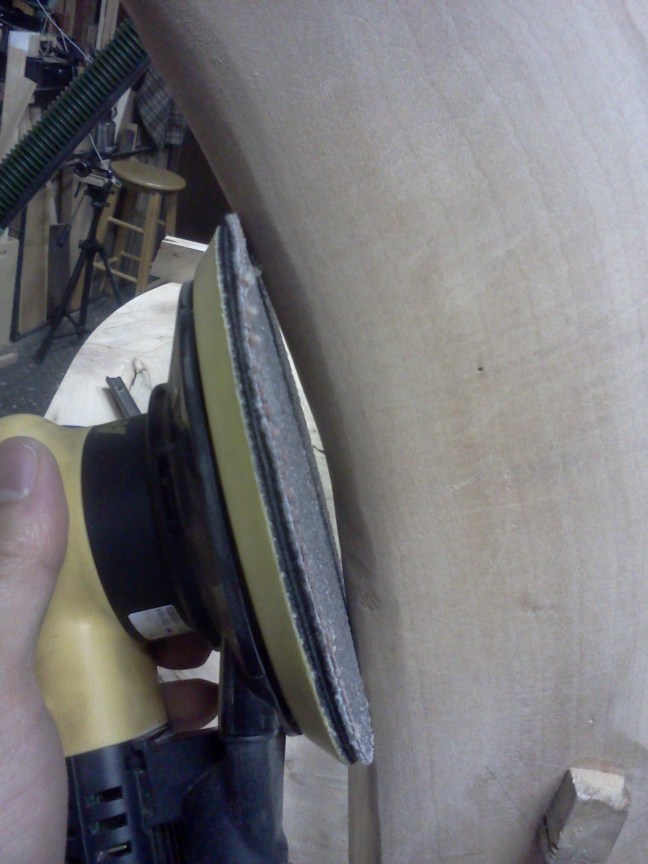
This video shows how I use my 6″ Mirka CEROS (Compact Electric Random Orbit Sander) and a 40-grit Abranet HD disc to sand the sculpted legs. I normally wear a dust mask while sanding, but I I forgot while thinking about camera angles. Use a dust mask! The CEROS is very good at collecting dust when used on flat surfaces but not as good when sanding rounded surfaces. The Abranet HD discs are less effective at catching dust from the regular Abranet discs.
DyamiPlotke @FlairWoodworks I’ll check on a PC [power carver] later, but is there a particular model (grit?) good for a newb? -8:30 PM May 17th, 2012
DyamiPlotke @FlairWoodworks excellent! -8:30 PM May 17th, 2012
FlairWoodworks @DyamiPlotke As far as an angle grinder, look for one that is compact and lightweight. Power isn’t really a factor. #flairww -8:54 PM May 17th, 2012
FlairWoodworks @DyamiPlotke Paddle switches are suppoed to be more reliable than sliders which can get clogged with dust. #flairww -8:54 PM May 17th, 2012
woodshaver101 @FlairWoodworks things are coming together nicely. keep it up. -8:56 PM May 17th, 2012
FlairWoodworks The sander does not do well on more severe convex sections. #flairww -9:01 PM May 17th, 2012
FlairWoodworks The foam interface pad allows the sander to handle curves like this but doesn’t fair the surface as well and is less aggressive. #flairww-9:01 PM May 17th, 2012
FlairWoodworks I’ll first fair the concave sections with a rasp, then use the sander with the 3/8″ foam interface pad and finer sandpaper. #flairww -9:03 PM May 17th, 2012
FlairWoodworks When it comes to rasps, I like them as coarse as they come. I rely on them to establish shape, not for smoothing. #flairww -9:08 PM May 17th, 2012
FlairWoodworks I don’t use templates or layout lines. Instead, I trust my eye and sense of touch. #flairww -9:11 PM May 17th, 2012

FlairWoodworks All I had for lunch was a slice of tiramisu, so I think I’ll need to stop for food soon. #flairww -9:14 PM May 17th, 2012
FlairWoodworks A round spokeshave would work well to fair this concave curve. #flairww -9:26 PM May 17th, 2012
FlairWoodworks Here’s where I’ll leave it for the night. #flairww -10:21 PM May 17th, 2012

Next comes more sculpting. Care to leave a comment?
Discover more from Products From The Mind of Chris Wong
Subscribe to get the latest posts sent to your email.

Chris I would like to see the tennons on the streacher trimmed and detailed. Just a 1/4″ or 1/2″ at most with a bevel detail would look polished. For the legs you have joined a curved piece and a staight piece. You are shaping a wonderfull organic shape to the raidus piece, but just rounding over the corners of the straight section. It seems like it could have a shallow curve along the outside of it at least. Maybe a defelection of 1″. Just feels the curves would feel better, and a little less like a Pick Nick table look. Great work! Enjoying the posts.
Morgan
Hi Morgan,
I wasn’t quite happy either with the tenons or the rectangular legs. I think you’ll like how the base looks in the next Session!
Thanks for commenting.
Chris
I agree with Morgan; I know you aren’t done at this point of the series (you are in real life, but I’m behind :)
Nice work with the sculpting so far. The curved leg has a nice radius to it.